Installing Windows XP on Netbooks and Other Computers Without DVD Drive
Netbooks, mid-level notebooks and tablet PCs often do not have a CD/DVD drive, but you still need a way to install operating system on such computer. Diskless OS installation is especially painful for older operating systems like Windows XP which were not originally designed to support booting from USB. Here FlashBoot comes in handy: it provides an easy way to install Windows from USB.
This article describes an easy way to install Windows XP from USB thumbdrive using FlashBoot on notebook, netbook, tablet PC or other computer without CD/DVD drive.
| Contents |
1. Preparing USB thumbdrive
Buy and install FlashBoot Pro.
Then follow this step-by-step guide:
1) Run FlashBoot Pro, click Next
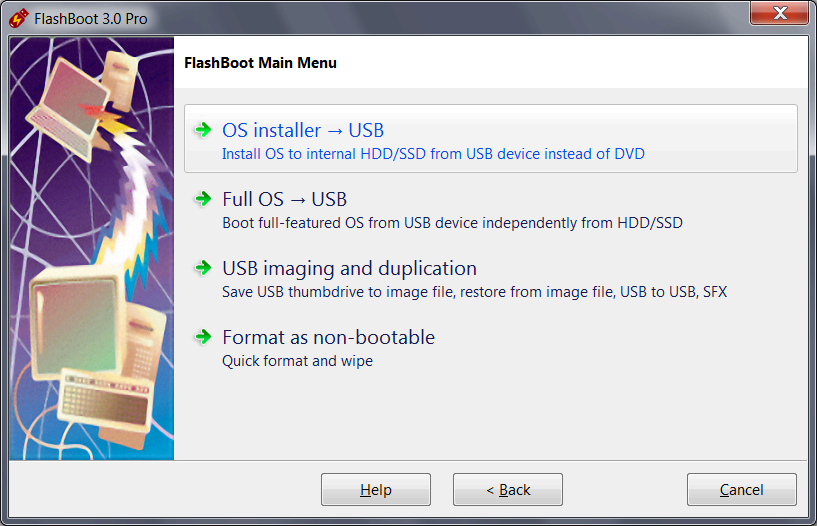
2) Choose "OS installer -> USB" in Main Menu
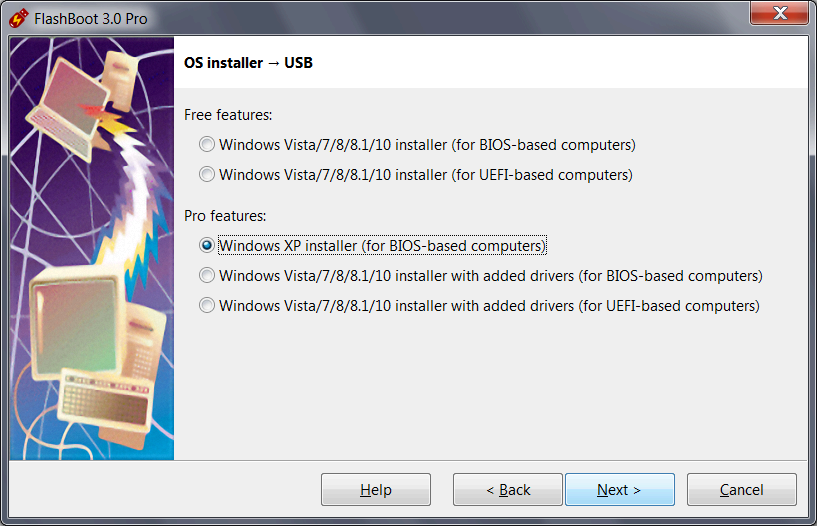
3) Choose "Windows XP installer (for BIOS-based computers)" in this menu and click Next
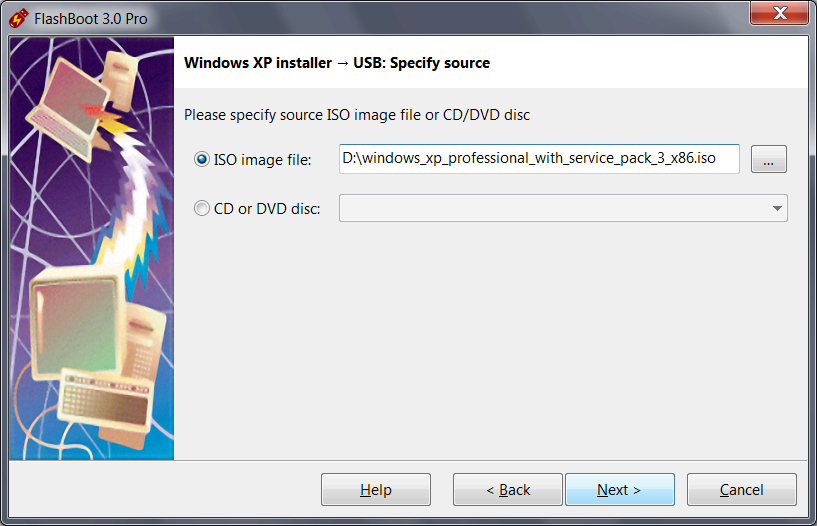
4) Specify ISO image file (or CD disc) of Windows XP setup and click Next
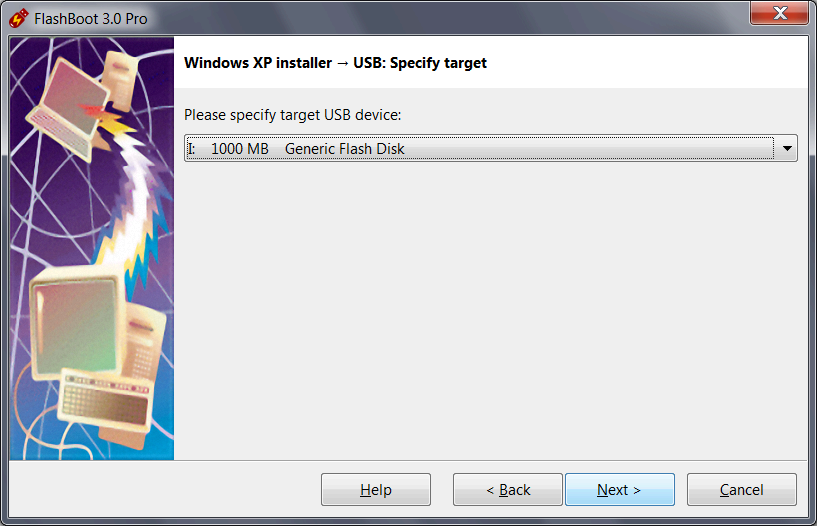
5) Specify target USB storage device and click Next
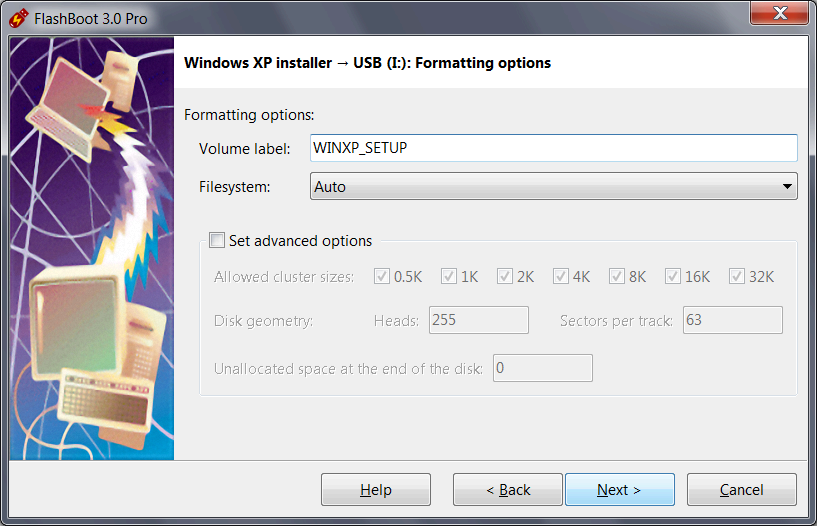
6) If necessary, change volume label, or leave it as is, and click Next
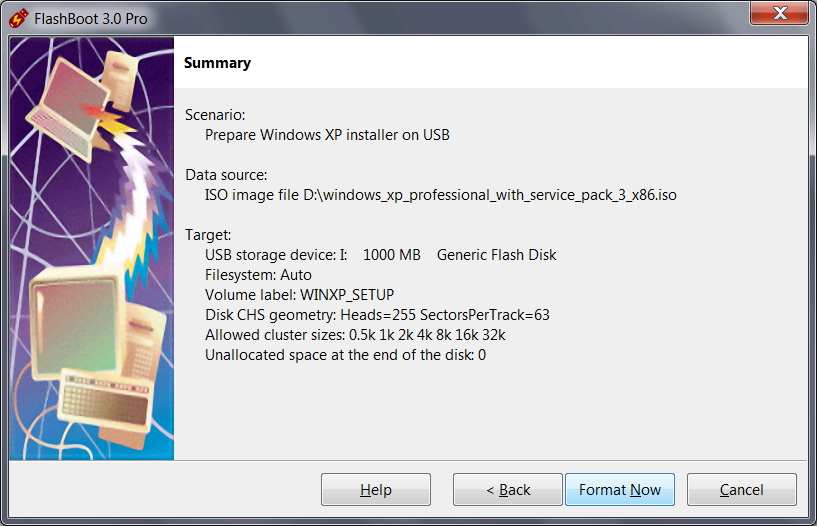
7) Check summary information and click Next
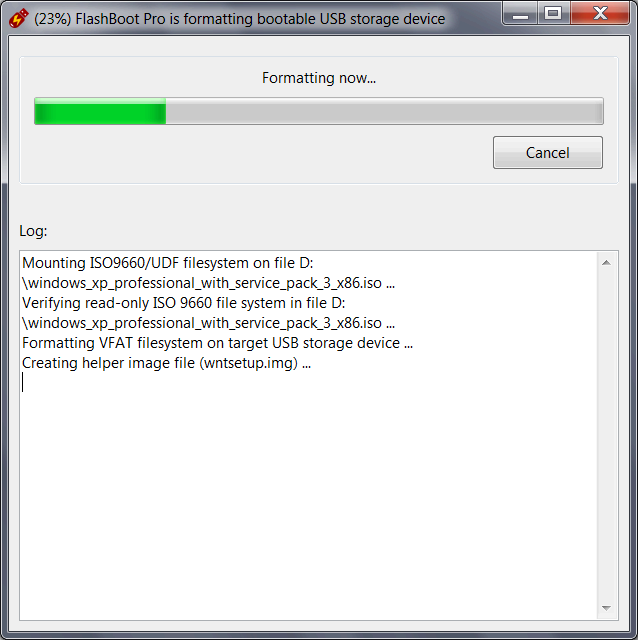
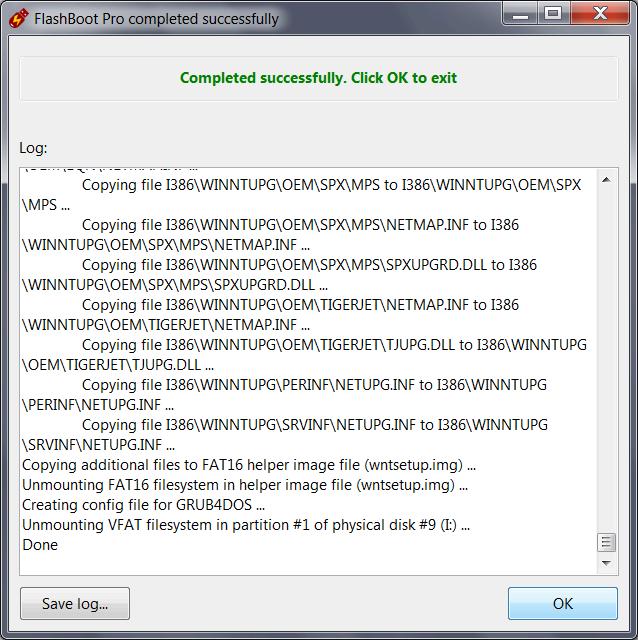
8) Wait for process completion
9) Bootable USB storage device is ready to use. Click OK to exit
2. Setting up BIOS to boot from USB thumbdrive
3. Running Windows XP installation from USB thumbdrive
This should be obvious. First, you need to create partitions with DOS-style FDISK, then installation continues usual way via DOS-based Setup, Text-Mode Setup and finally GUI Setup. If you have any questions, view this gallery of screenshots.
4. What if I'm getting BSoD (Blue Screen of Death) during installation?
This is probably because you have AHCI enabled in your BIOS setup. Read this article to get more information about working around BSoD issues during Windows XP installation.
| About us | Partners | Contact us | Privacy policy |