How to Backup Entire Computer (Applications, Documents and Other Data) with Emergency Boot Kit
Rather than waiting for digital disaster to happen and then trying to fix it with various tools and approaches, it's better to act proactively and have a full backup of your computer, so you can always get back to known good state at a glance.
Emergency Boot Kit can backup your whole computer (applications, documents and other data) or a chosen subset of your data. Backup copy is saved in open format, so it can be restored either with Emergency Boot Kit or other tools if necessary.
| Contents |
1. Theory, Tools and Hardware
All data on your computer is stored in disk partitions. You can backup partitions into compressed image files and store them on USB thumbdrive or external USB HDD. Compressed image of disk C: contains Windows, desktop, all software installed into Program Files, entire Registry (application and system settings), documents, browser data (bookmarks, saved password, history), games etc.
So, you can make a snapshot of your entire computer, which can be restored at any time later, resetting the whole computer to the known good state.
Snapshot may include other partitions (for example D:) if you have them — so in emergency situation not only the operating system, but your data can be restored as well. Or you can back up your disk D: as usually (each file separately), and use whole partition image backup just for disk C: — so retain bootability, NTFS junctions and special NTFS access permissions for system files and folders.
You need Emergency Boot Kit to make
whole system backup as described above.
Here is an instruction how to deploy
Emergency Boot Kit to USB thumbdrive and set up your computer to boot from USB thumbdrive.
You can use the same USB thumbdrive or USB HDD to store saved partition images.
2. Making Backup
1) Boot into Emergency Boot Kit, Choose Partition Manager in the main menu:

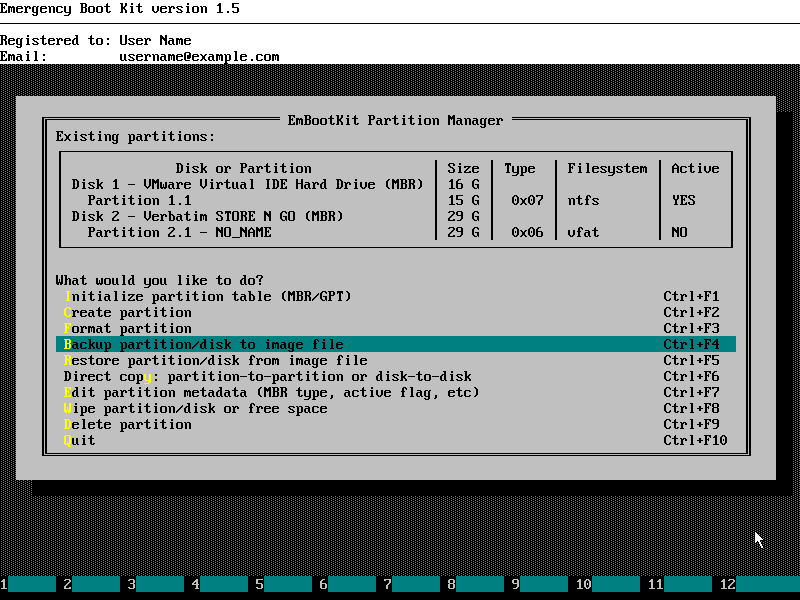
2) Choose "Backup partition/disk to image file" in the Partition Manager menu:
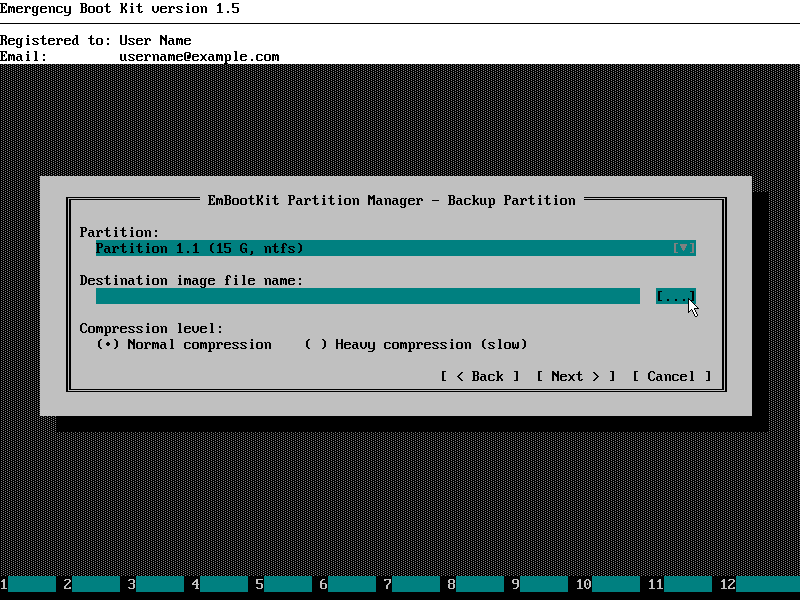
3) Choose partition to backup (your disk C: in Windows) and click [...] button:
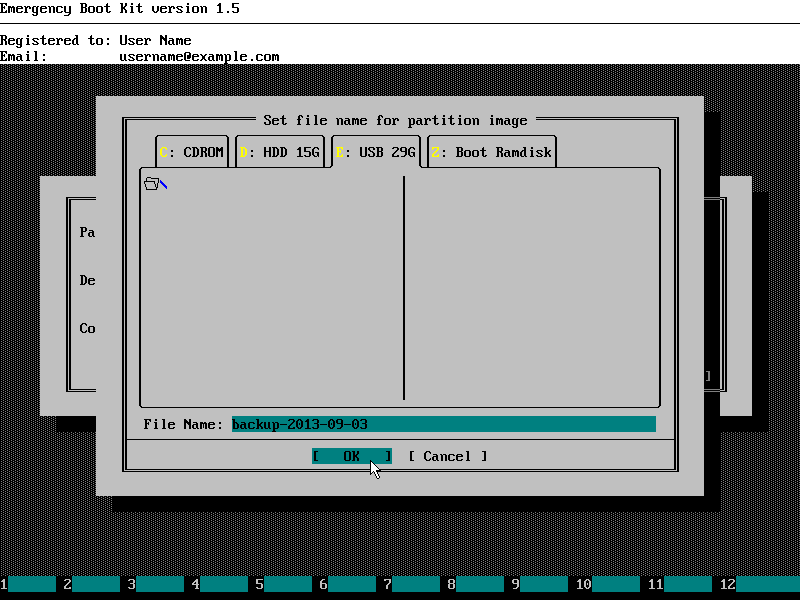
4) Choose disk and folder to save compressed partition image file to (E: USB 29G in this example) and then type in the file name to the corresponding input field (backup-2013-09-03 in this example).
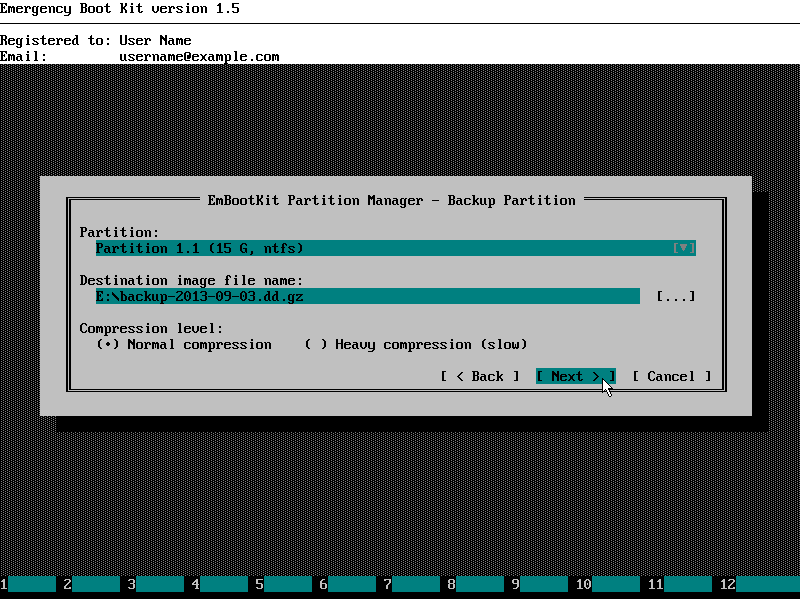
5) Check image file name and click "Next >" button to start saving partition image:
6) Partition backup in progress:

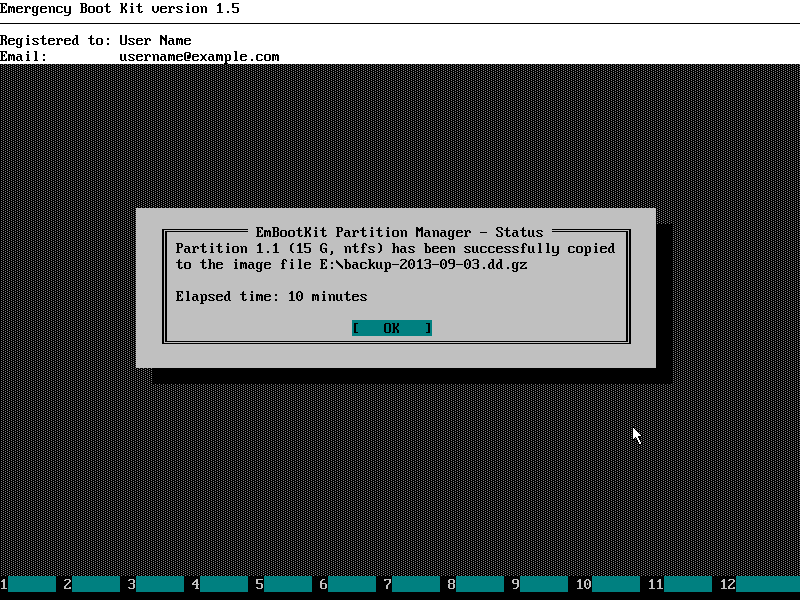
7) Partition backup complete:
If you have multiple partitions to backup (not just disk C:), then repeat steps 2-7 for each additional partition. Images file names of different partitions should be different.
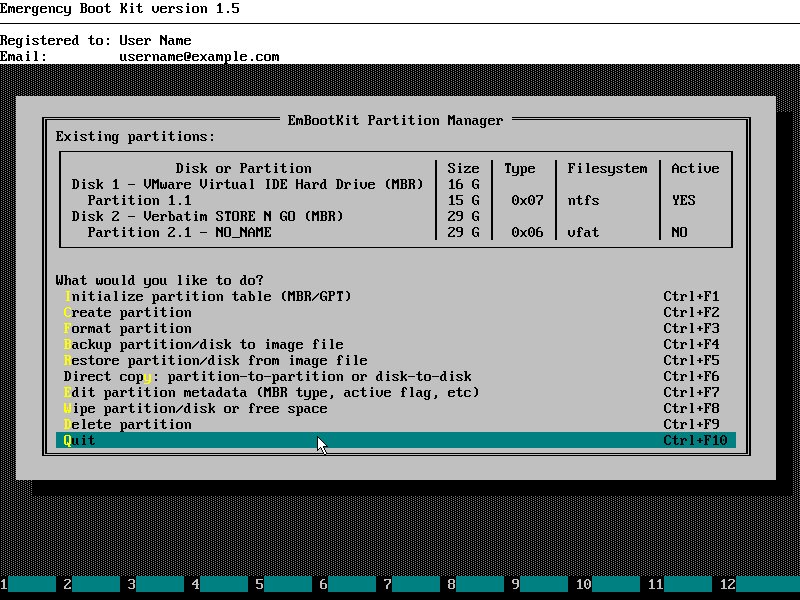
Then quit the Emergency Boot Kit Partition Manager:
3. Restoring From Backup
1) Boot into Emergency Boot Kit, Choose Partition Manager in the main menu:
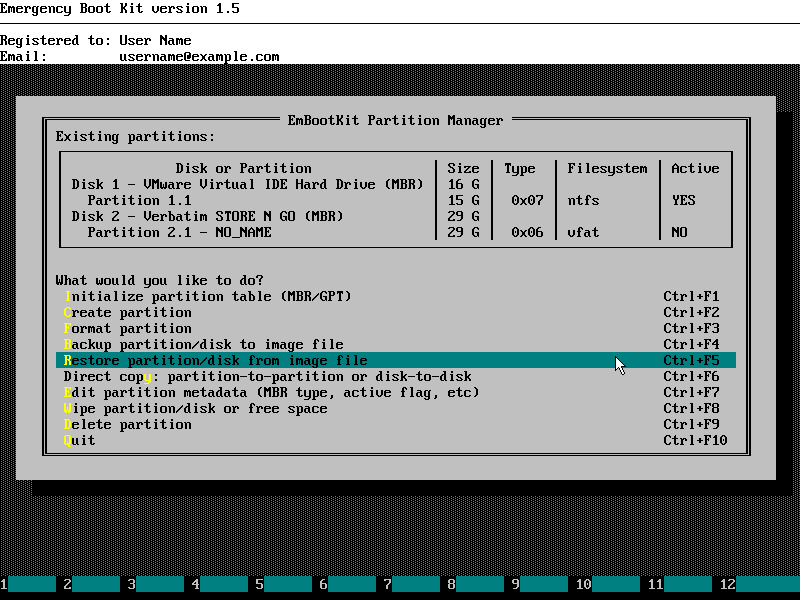
2) Choose "Restore partition/disk from image file" in the Partition Manager menu:
3) Choose destination partition (your disk C: in Windows) and click [...] button:
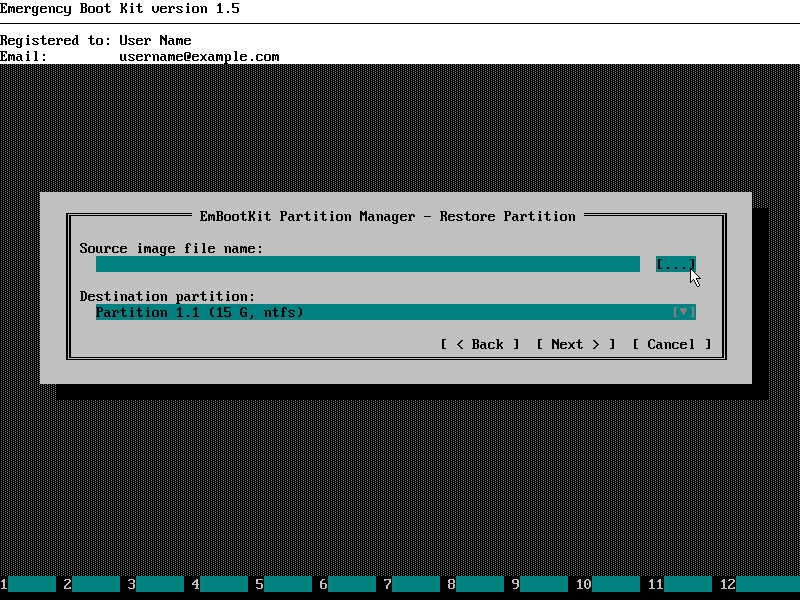
4) Choose disk and folder which contains compressed partition image file (E: USB 29G in this example) and then click on that file (backup-2013-09-03.dd.gz in this example).

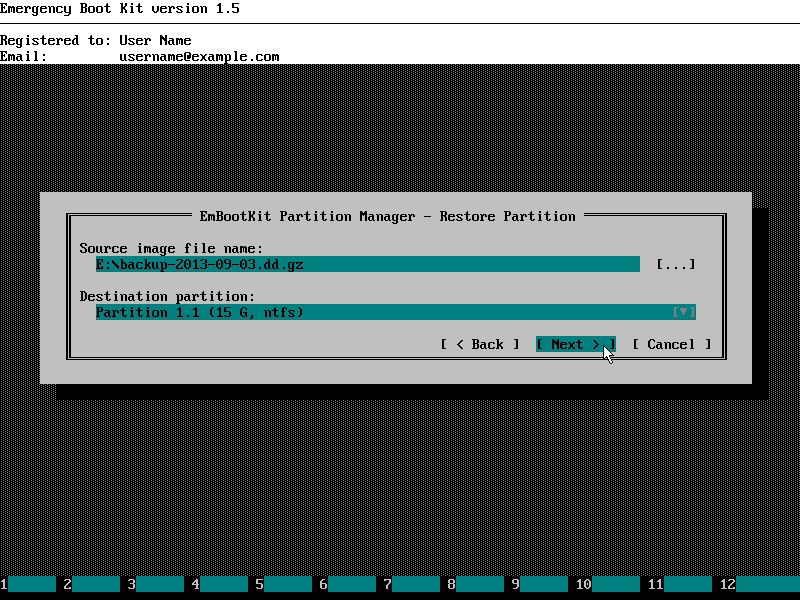
5) Check target partition once again and click "Next >" button:
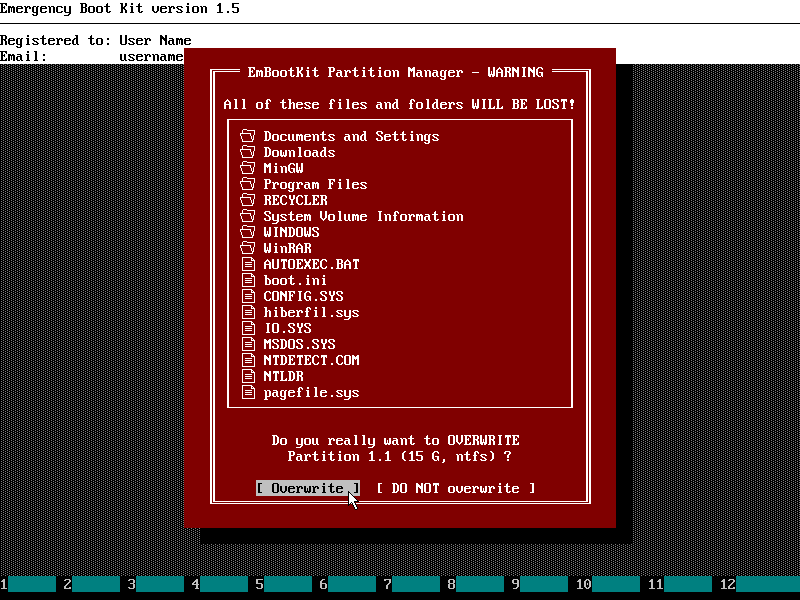
6) Read this warning carefully:
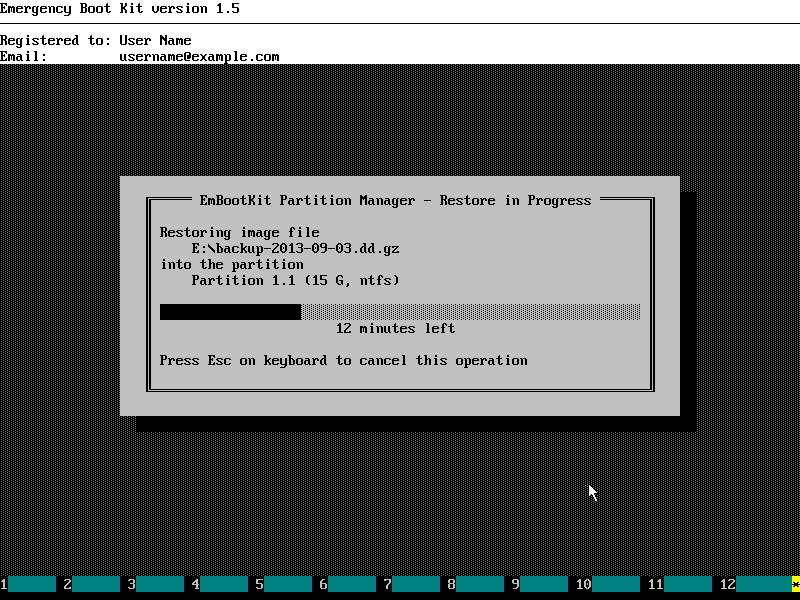
7) Partition restore in progress:
8) Partition restore complete:
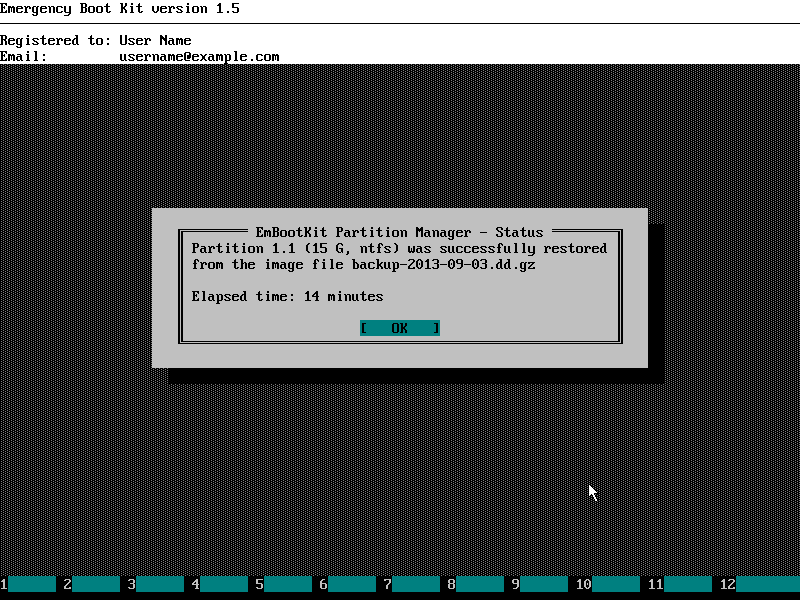
If you have multiple partitions to backup (not just disk C:), then repeat steps 2-8 for each additional partition. Different partitions should be restored from different images files.
Then quit the Emergency Boot Kit Partition Manager:
4. Verifying Boot Path
Now you should verify that disk C: is still bootable. It may be not bootable if NT disk signature has been changed between backup and restore, or if start of partition was moved due to partition realignment or other reasons.
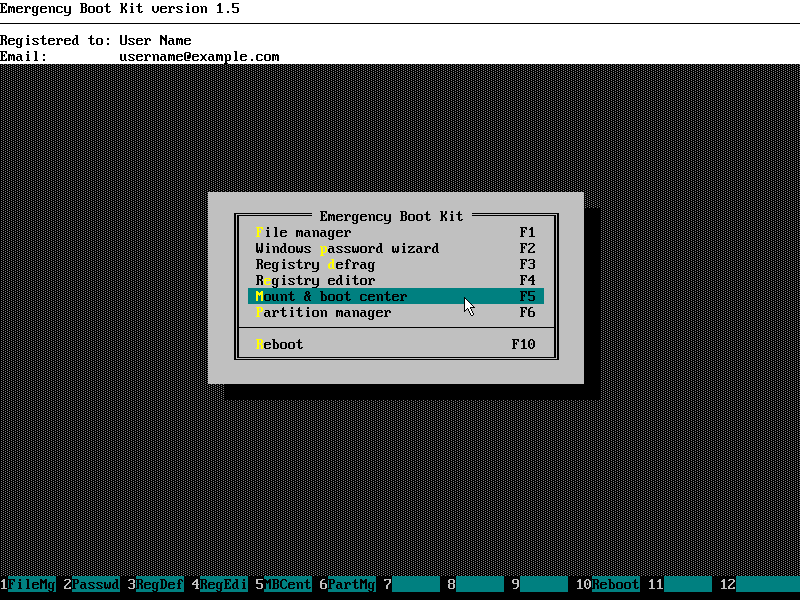
1) Run Emergency Boot Kit Mount & Boot Center:
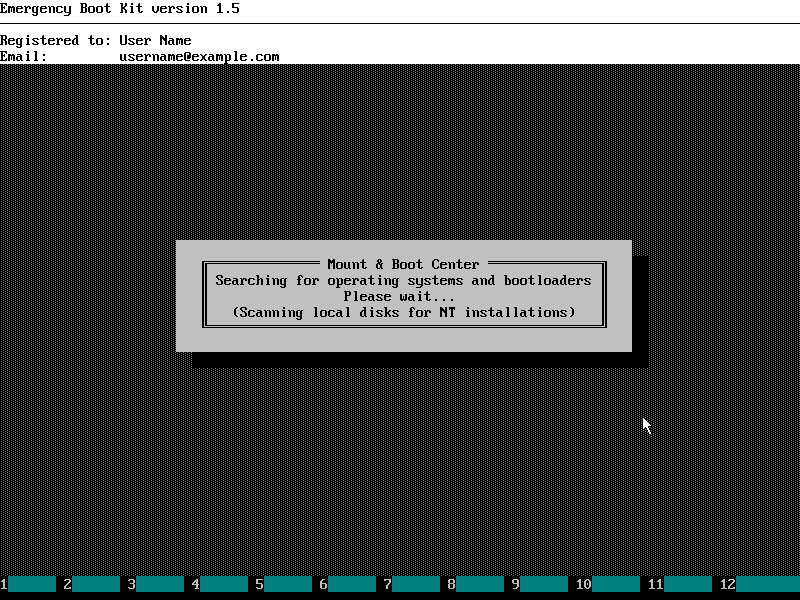
2) Wait for Emergency Boot Kit Mount & Boot Center to load:
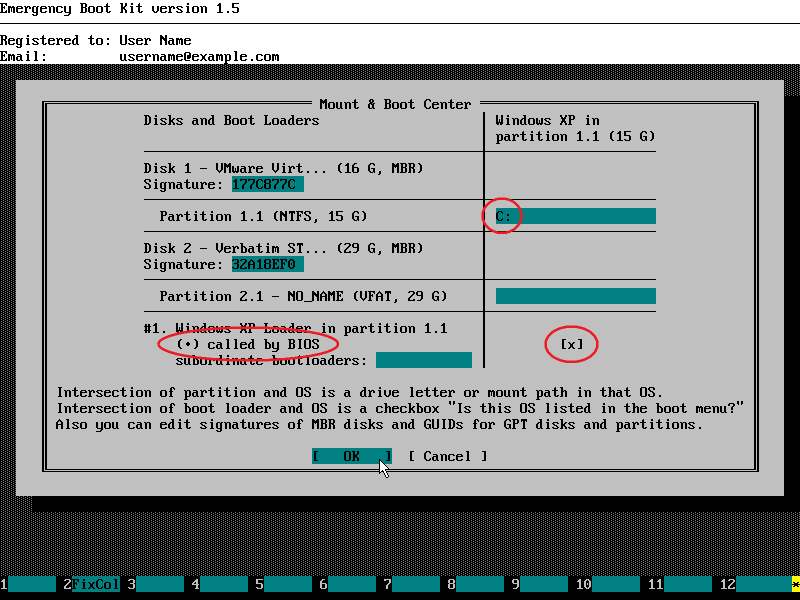
3) Make sure your windows partition is mounted as C:, Windows Loader is called by BIOS and Windows Loader is linked with Windows. If some of these conditions does not hold, make corrections as necessary and click OK:
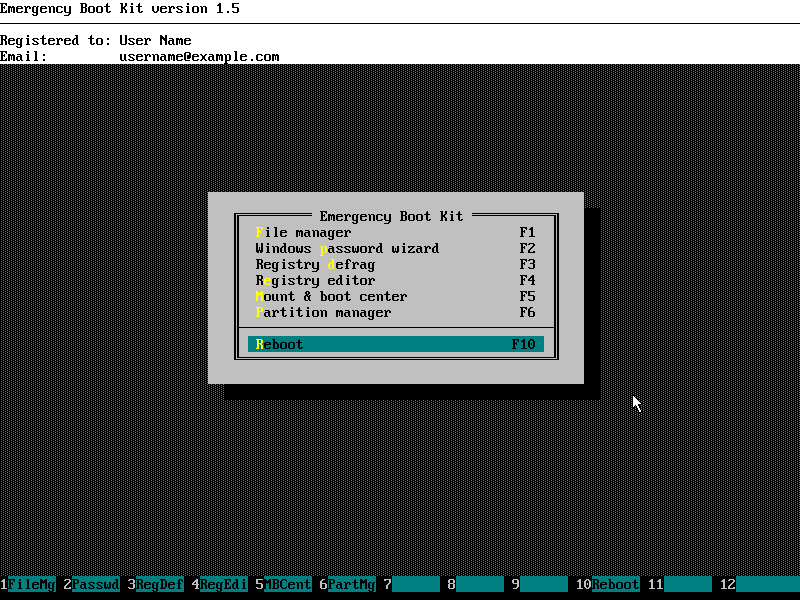
4) Done. Choose Reboot in main menu of Emergency Boot Kit:
| About us | Partners | Contact us | Privacy policy |