How To Transfer OS From HDD To SSD Without Reinstall
SSDs are undoubtedly much more faster, reliable and energy-efficient in comparison with traditional HDDs, but it's a real pain to manually move entire operating system, including user profiles, installed software, games, documents, settings, and all of your data from HDD to SSD. Fortunately, it's possible to perform migration from HDD to SSD without reinstalling Windows and everything else, by using Emergency Boot Kit.
This article explains step by step, how to transfer Windows from HDD to SSD, migrate to a solid-state disk without reinstalling Windows and applications.
| Contents |
1. Intended audience
What's cool about solid state disks? They are amazingly fast compared to the traditional platter-based hard drives, they have no moving parts (thus much more mechanically reliable and shock-resistant) and they consume much less energy.
This article is for people who want to move Windows from HDD to SSD without reinstallation. It lets you perform safe migration of live operating system, user profiles, installed software, games, documents, settings, and all of your data. So you can avoid the tedious process of reinstalling and reconfiguring your OS and all of your applications.
2. Solution in a nutshell
- Download Emergency Boot Kit and deploy it to USB thumbdrive. You need a full version for the purpose of this article.
- Power off your computer.
- Attach new SSD to the computer as a second (non-bootable) storage device.
- Boot Emergency Boot Kit.
- Create partitions on SSD using Emergency Boot Kit Partition Manager.
- Copy Windows partition from HDD to SSD.
- Copy System Reserved partition from HDD to SSD.
- Fix mount points and boot path on SSD using Emergency Boot Kit Mount & Boot Center.
- Change BIOS settings to boot from SSD and assign old HDD to be a second storage device.
- Boot into Windows.
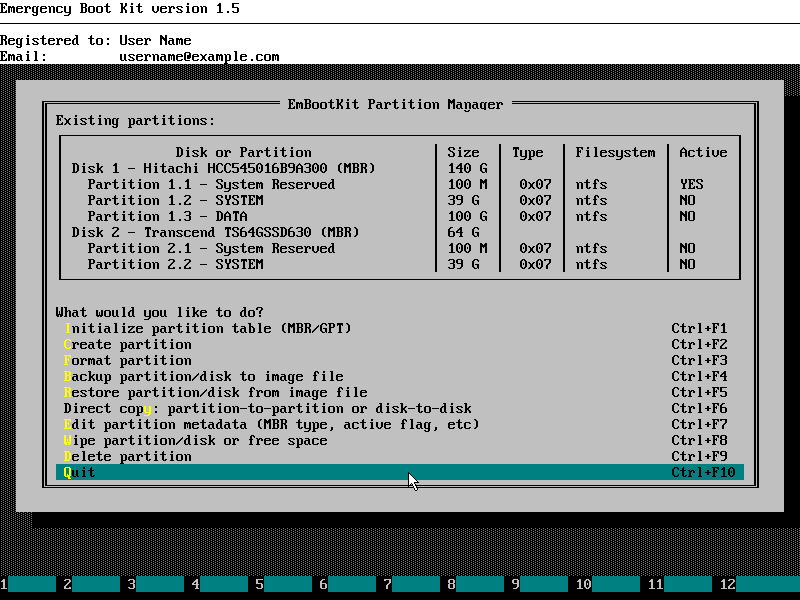
3. Creating partitions on SSD
This section explains in detail how to create two initial partitions on SSD (System Reserved Partition and Windows Partition) using Emergency Boot Kit Partition Manager.
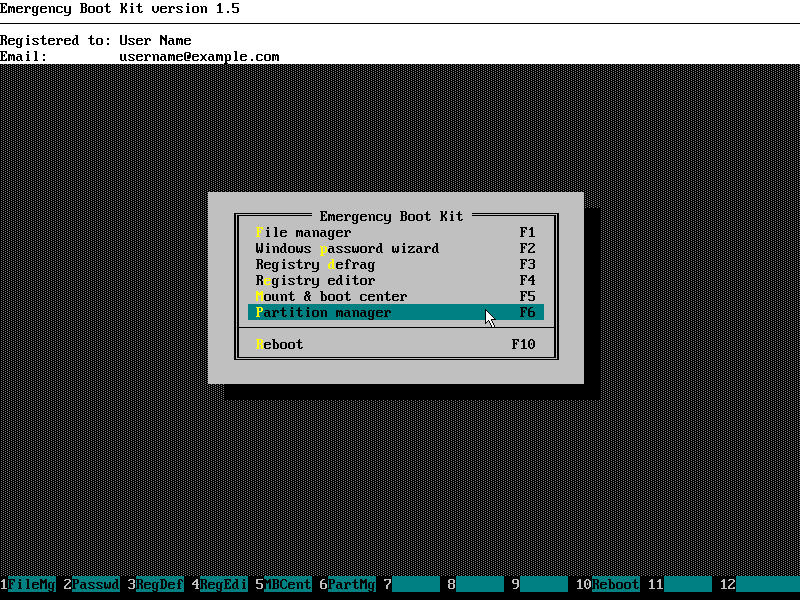
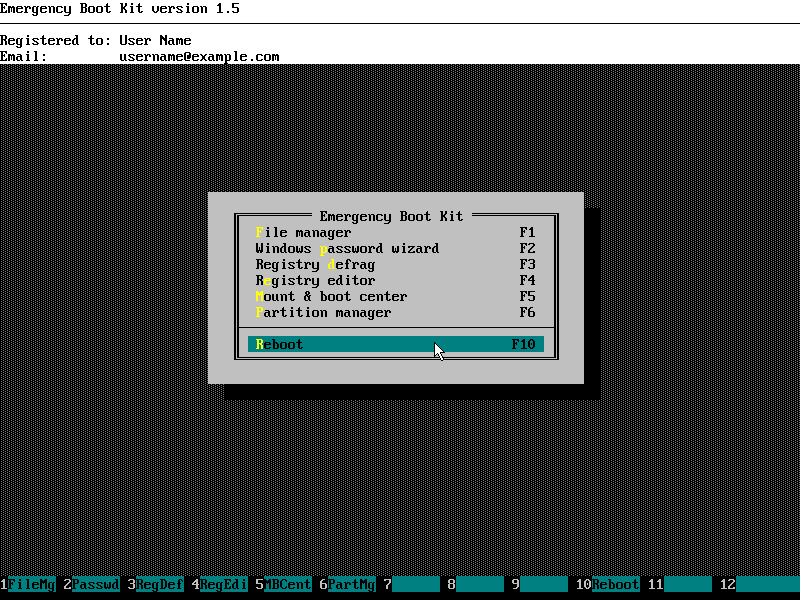
1. Choose "Partition manager" in the main menu of Emergency Boot Kit.
2. Choose "Initialize partition table (MBR/GPT)" in the menu of Emergency Boot Kit partition manager.

3. Choose your brand new SSD from the drop-down list and set type of partition table as MBR:

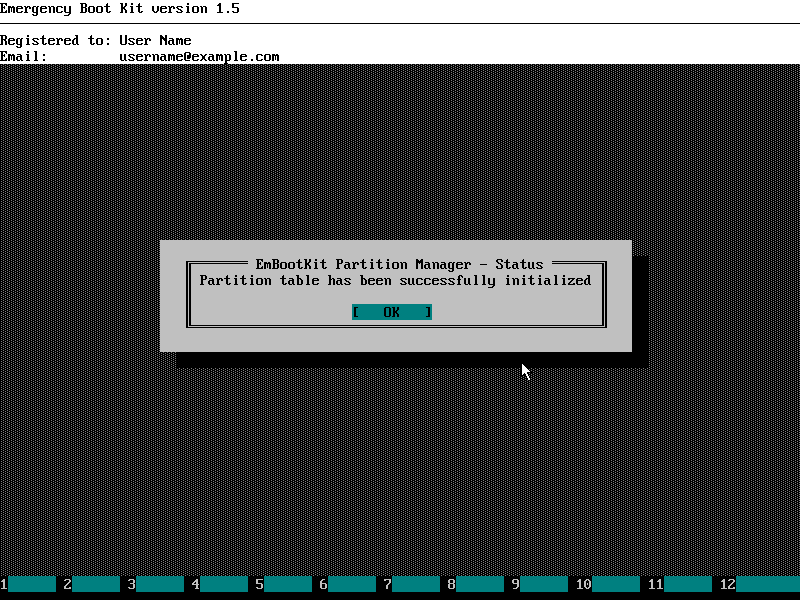
4. Wait until the following window appears and click OK:
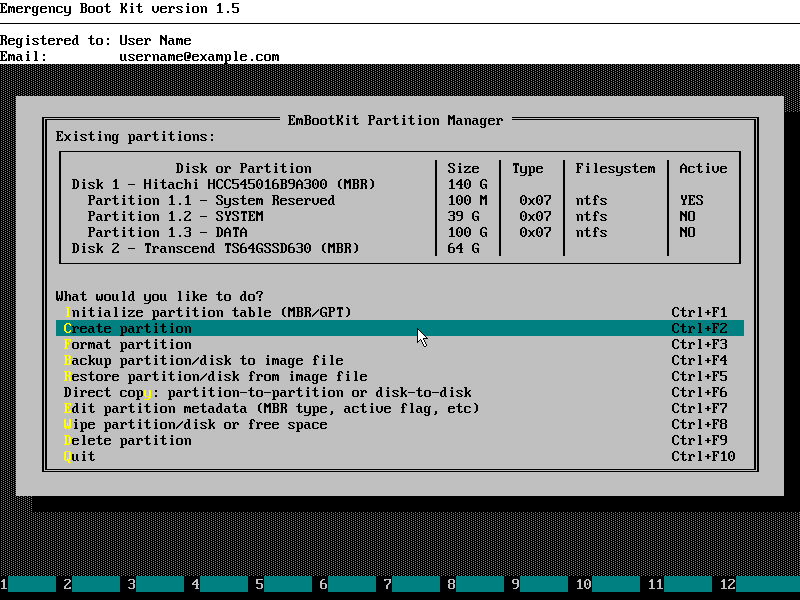
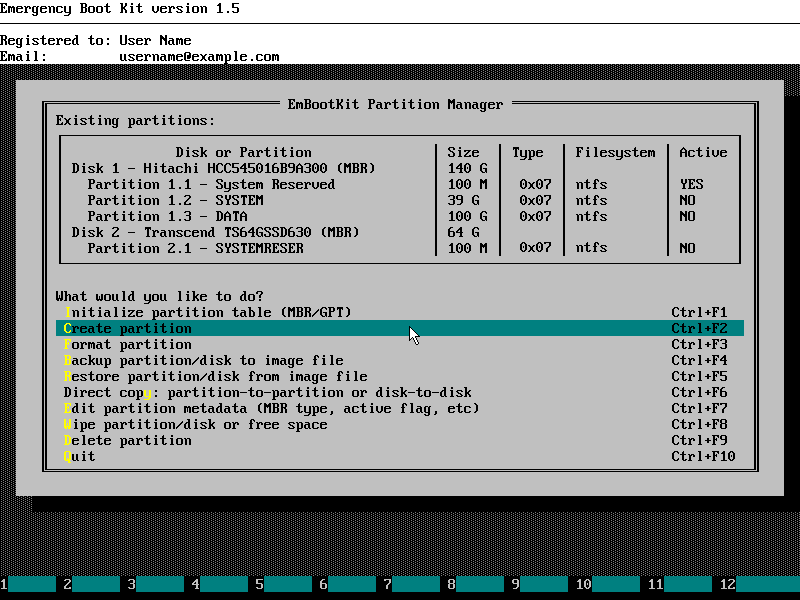
5. Note "(MBR)" suffix appeared after SSD block device id in the "Existing Partitions" list.
Choose "Create partition" in the menu of Emergency Boot Kit partition manager:
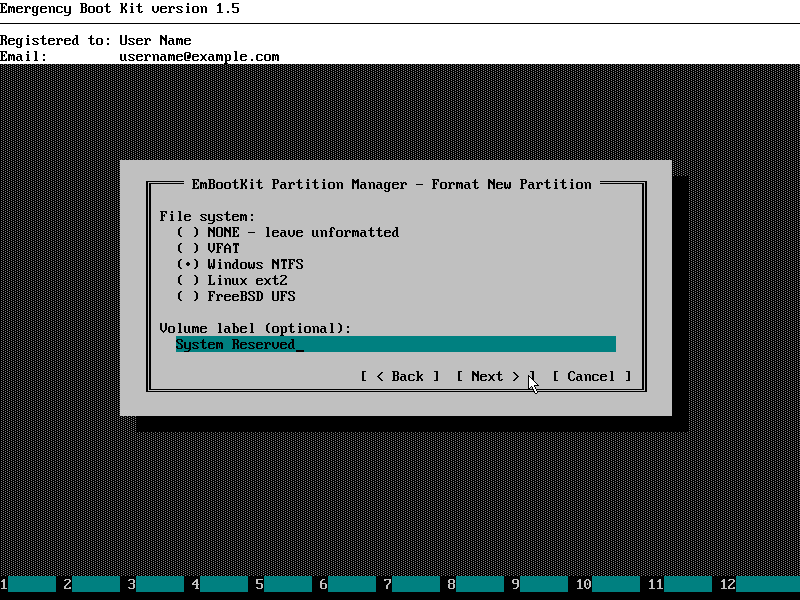
6. Choose your brand new SSD from the drop-down list and set size of System Reserved partition to be created (a little bigger than the original 100M so block-copied data will fit):
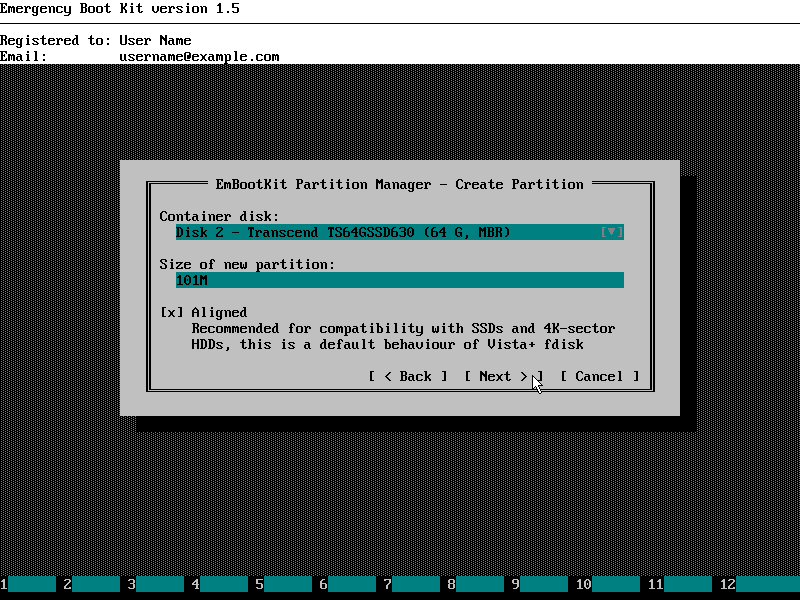
7. Set filesystem type to NTFS and, optionally, volume label to "System Reserved":
8. Wait until the following window appears and click OK:
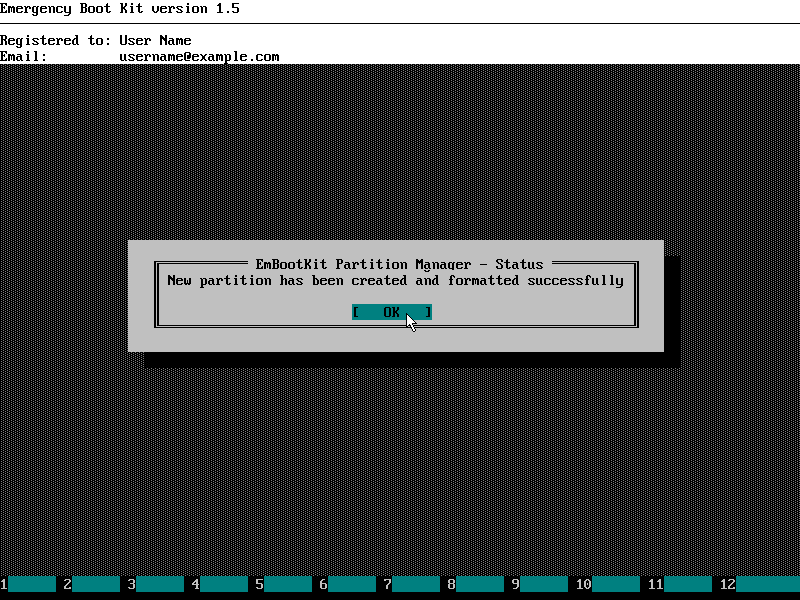
9. Note new partition appeared on the SSD in the "Existing Partitions" list.
Choose "Create partition" in the menu of Emergency Boot Kit partition manager:
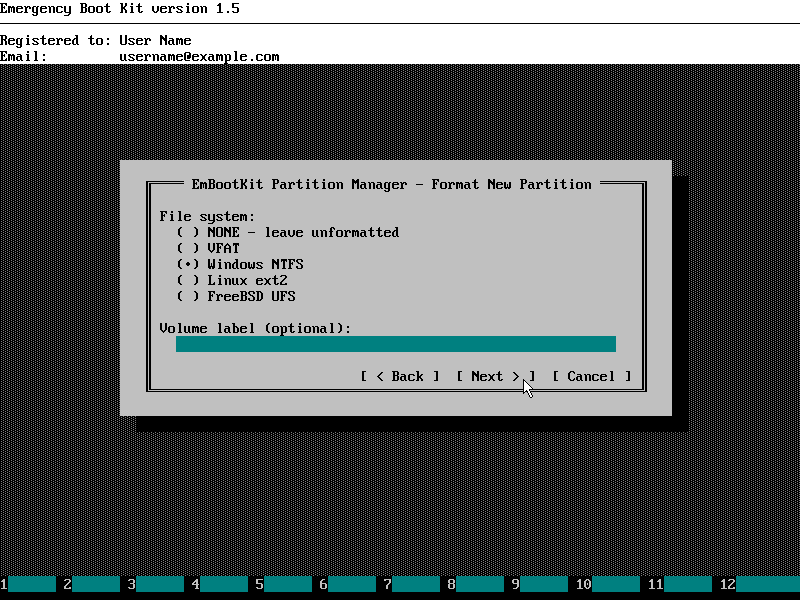
10. Choose your brand new SSD from the drop-down list and set size of Windows partition to be created (a little bigger than the original 39G so block-copied data will fit):

11. Set filesystem type to NTFS:
12. Wait until the following window appears and click OK:

Note new partition appeared on the SSD in the "Existing Partitions" list in the menu of Emergency Boot Kit partition manager.
4. Copying the System Reserved partition
This section explains in detail how to copy System Reserved partition from HDD to SSD using Emergency Boot Kit Partition Manager.
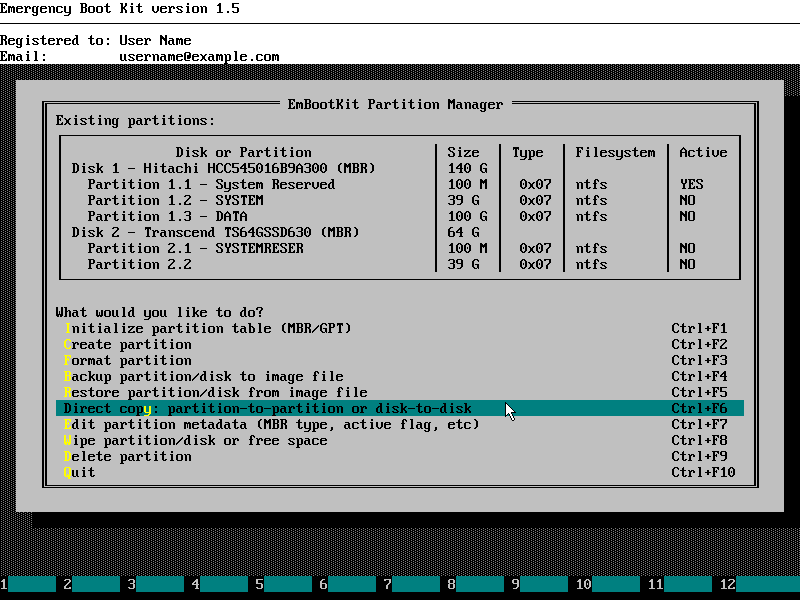
1. Choose "Direct copy: partition-to-partition or disk-to-disk" in the menu of Emergency Boot Kit partition manager:
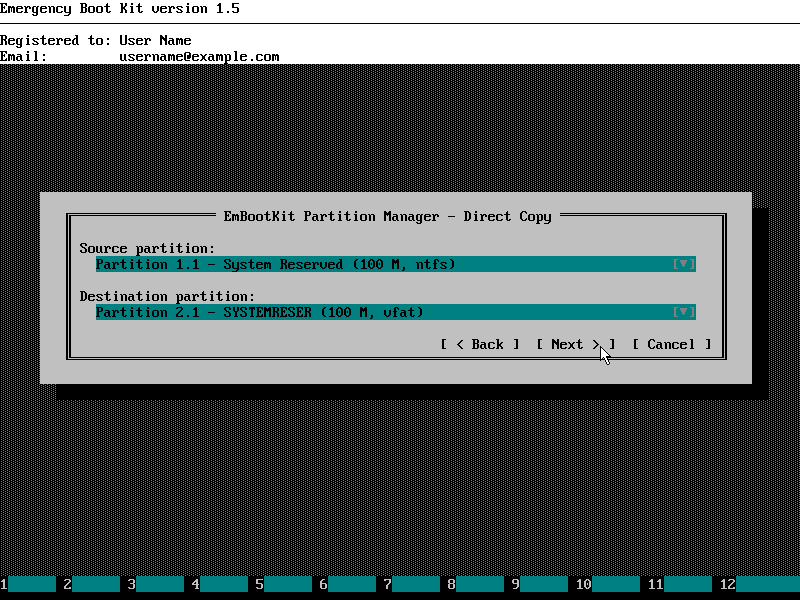
2. Choose source partition on the HDD and destination partition on the SSD. Both of them must correspond to System Reserved partition about 100MB in size:
3. Wait until the following window appears and click OK:
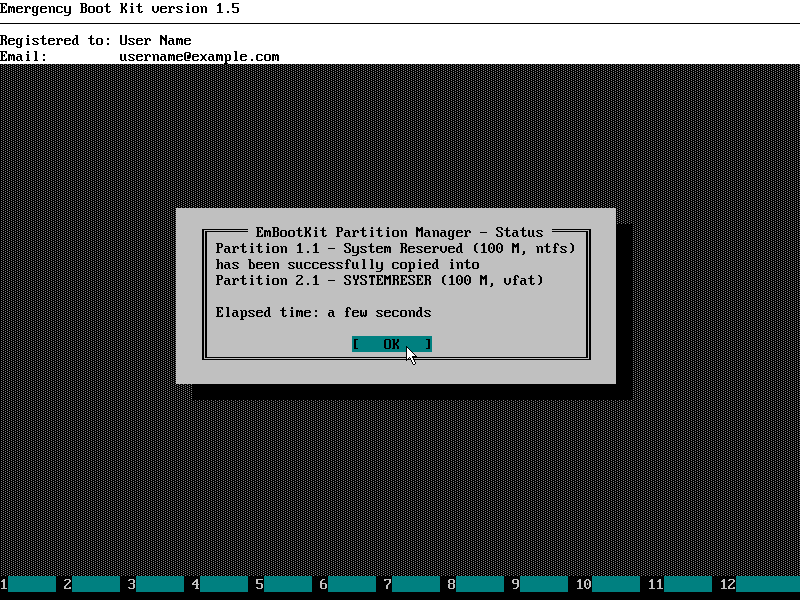
Note destination partition volume label changed in the "Existing Partitions" list in the menu of Emergency Boot Kit partition manager.
5. Copying the Windows partition
This section explains in detail how to copy Windows partition from HDD to SSD using Emergency Boot Kit Partition Manager.
1. Choose "Direct copy: partition-to-partition or disk-to-disk" in the menu of Emergency Boot Kit partition manager:

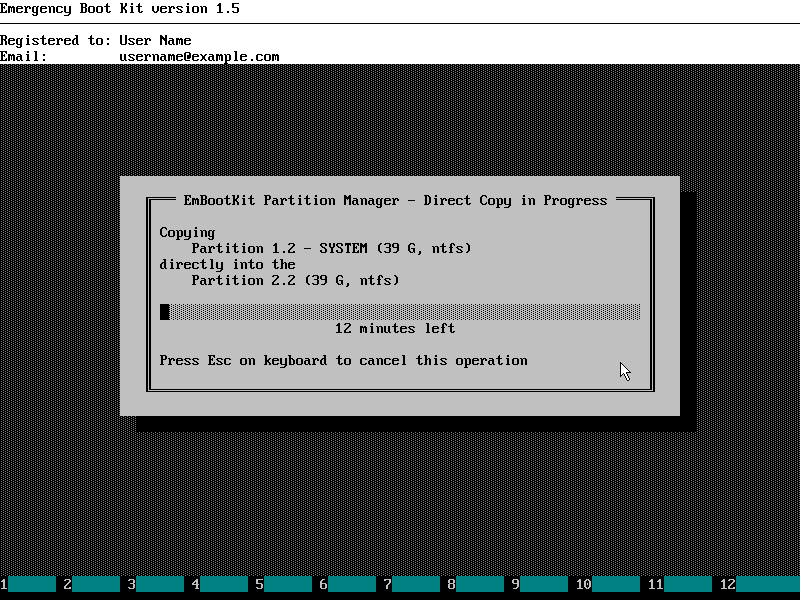
2. Choose source partition on the HDD and destination partition on the SSD. Both of them must correspond to Windows partition several gigabytes in size:

3. Progress window will look like this:
4. Wait until the following window appears and click OK:

5. Note destination partition volume label changed in the "Existing Partitions" list in the menu of Emergency Boot Kit partition manager. Choose "Quit" in the menu of Emergency Boot Kit partition manager:
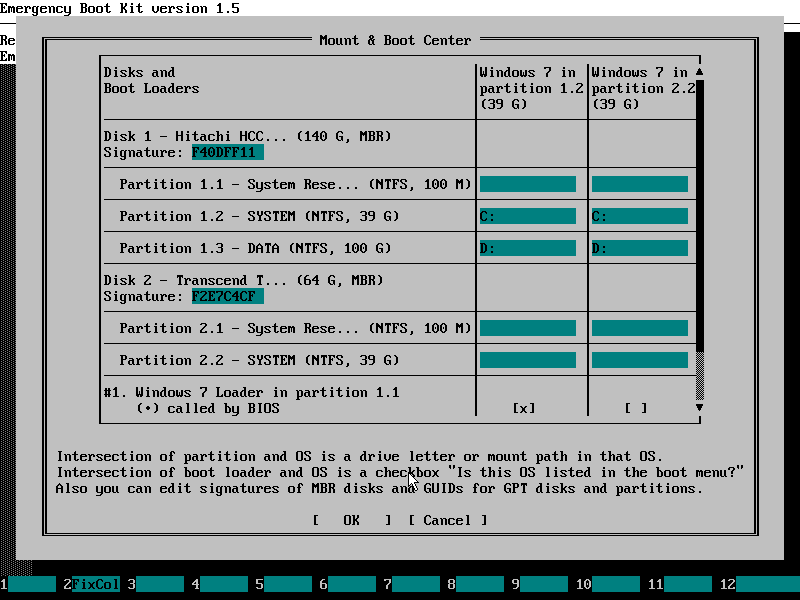
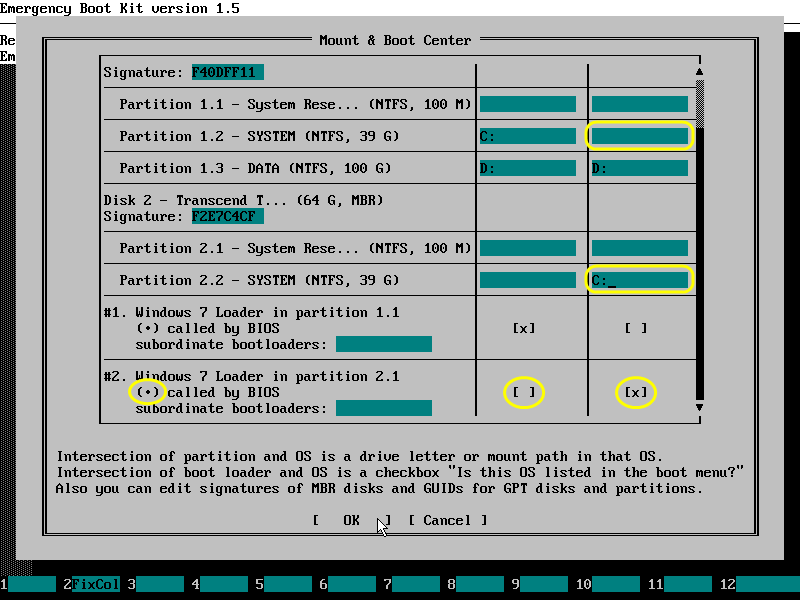
6. Fixing mount points and boot path
This section explains in detail how to fix mount points and boot path using Emergency Boot Kit Mount & Boot Center. This final step is necessary to change Windows' notion of where is disk C: to be found, and to change Boot Loader's notion of where is Windows to be found.
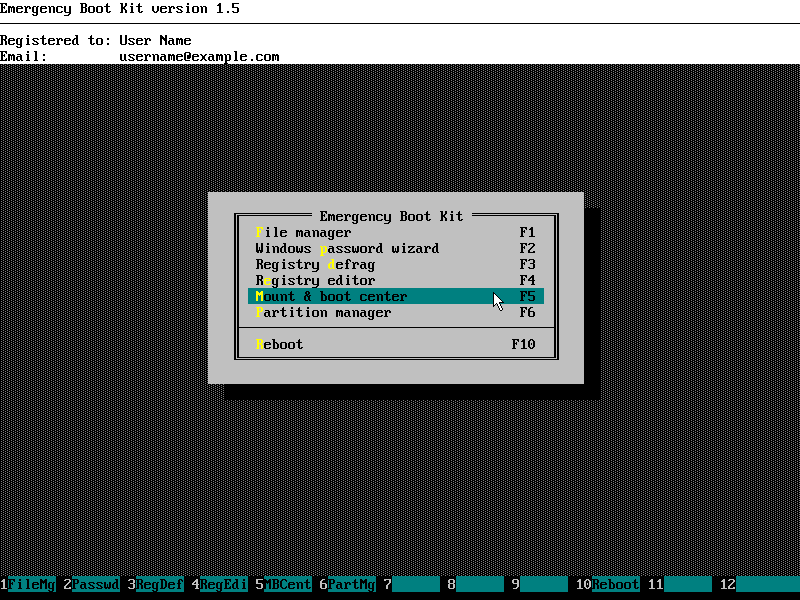
1. Choose "Mount & Boot Center" in the main menu of Emergency Boot Kit.
2. Mount & Boot Center screen will look like this:
3. Adjust location of disk C: in the context of SSD-based Windows, make sure Windows loader on SSD is called by BIOS, make sure Windows on SSD is bound to Windows Loader on SSD, make sure Windows on HDD is not bound to Windows Loader on SSD:
4. Then click OK and wait until changes are commited to disk:

5. Finally, reboot your computer from the main menu of Emergency Boot Kit:
| About us | Partners | Contact us | Privacy policy |