Installing Windows From USB With FlashBoot
Usually Windows is installed from DVD disc, but these days it's much more convenient to install operating system from USB thumbdrive. A lot of modern hardware does not even have a builtin DVD reader/recorder. With FlashBoot, you can install Windows from USB, and so avoid using external USB DVD reader/recorder for Windows installation.
This article explains how to install Windows from USB thumbdrive or USB HDD using FlashBoot. Step by step guide.
| Contents |
1. Preparing USB thumbdrive
Get USB thumbdrive with capacity at least 8Gb.
Download and install FlashBoot Free.
Then follow this step-by-step guide:
1) Run FlashBoot Free or FlashBoot Pro, click Next
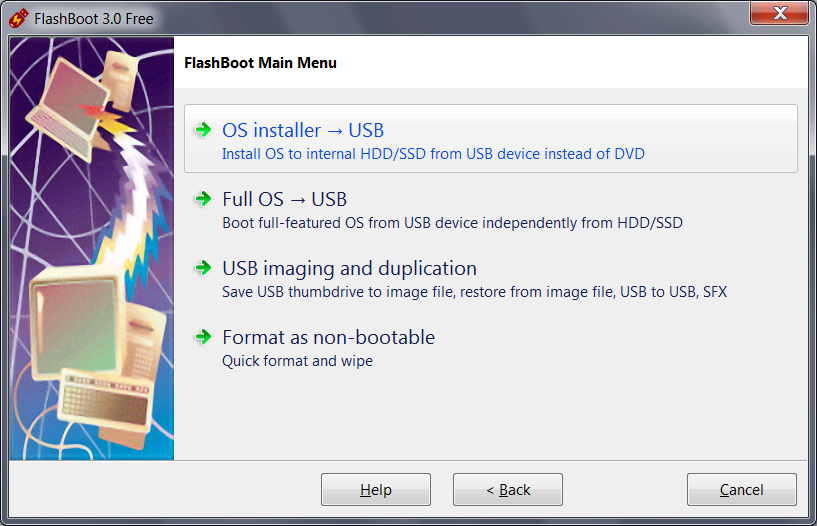
2) Choose "OS installer -> USB" in the Main Menu
3) Choose "Windows Vista/7/8.x/10/11 installer (for BIOS-based computers)" or "Windows Vista/7/8.x/10/11 installer (for UEFI-based computers)" in this menu and click Next.
UEFI mode must be chosen if you want to install Windows to 3Tb+ boot HDD. It may be chosen if you have UEFI-compatible computer. Most computers manufactured after 2012 are UEFI-compatible, but if you intend to install Windows to older computer, then use BIOS mode instead of UEFI mode.
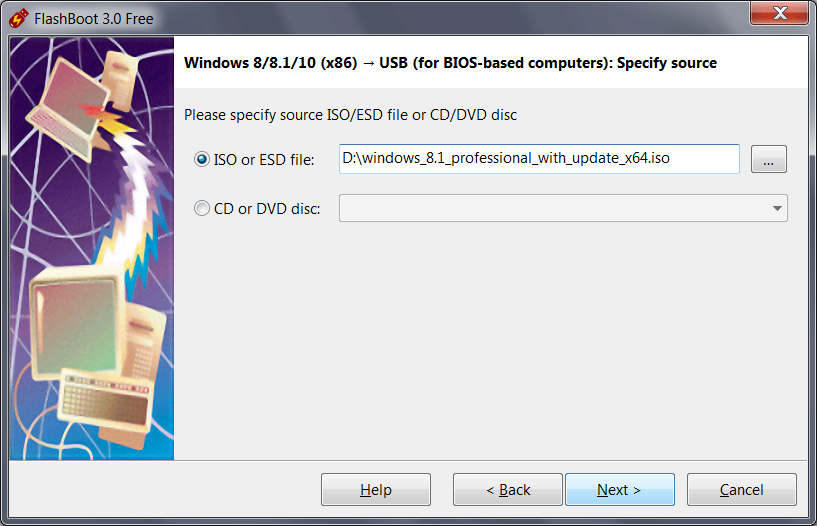
4) Specify ISO image file (or DVD disc) of Windows setup and click Next
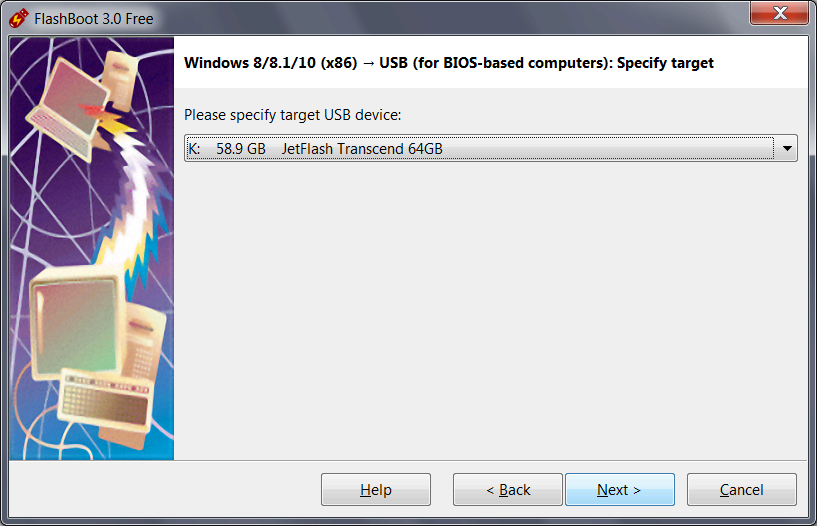
5) Specify target USB storage device and click Next
6) If necessary, change volume label and filesystem type, or leave them as is, and click Next. If source ISO file or DVD contains \sources\install.wim file larger than 4GB (so it won't fit on FAT32), then filesystem choice option won't be presented (NTFS will be assumed). For UEFI mode, FAT32 filesystem will be always assumed.

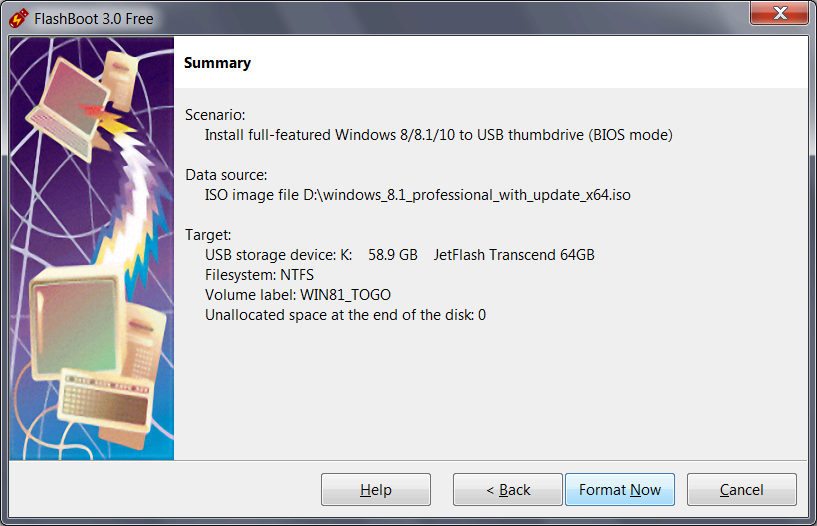
7) Check summary information and click Format Now
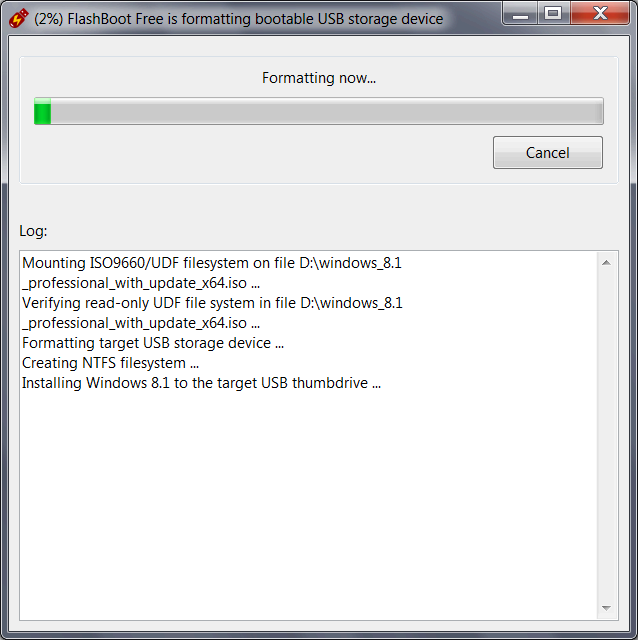
8) Wait for process completion
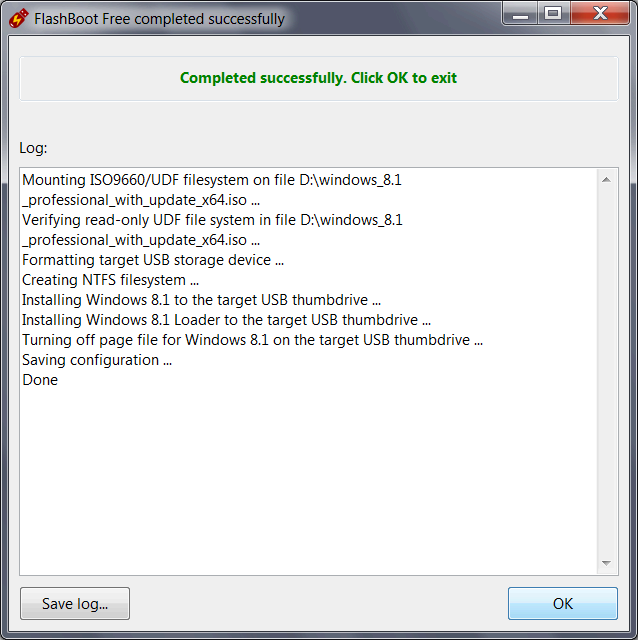
9) Bootable USB storage device is ready to use. Click OK to exit
2. Setting up BIOS to boot from USB thumbdrive
3. Troubleshooting
Sometimes during Windows installation you can encounter the following error:
   A required CD/DVD device driver is missing. If you have a driver floppy disk,
   CD, DVD or USB flash drive, please insert it now.

   Note. If the windows installation media is in the drive, you can safely
   remove it for this step.
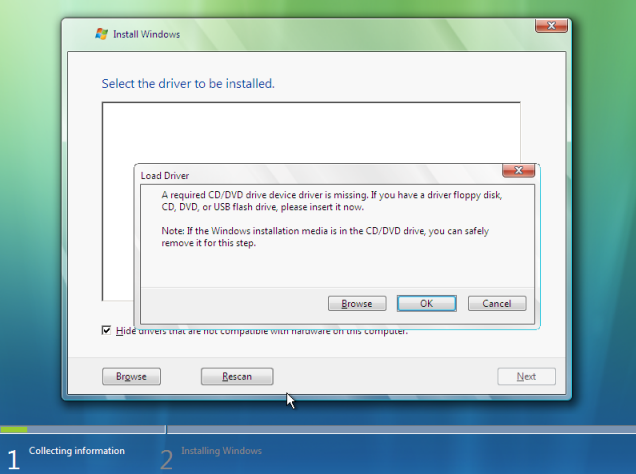
This error means that Windows setup can't find its source USB thumbdrive.
Usually it is caused by running Windows 7 or Windows Vista setup from USB 3.0 (blue) port. If your computer has USB 2.0 (black) ports, please replug installation thumbdrive to black port and restart Windows setup. Please note that starting from Sky Lake, Kaby Lake, and Ryzen platforms, even black (USB 2.0) ports require XHCI (USB 3.0) drivers.
Some BIOSes still have an option to put USB 3.0 controller to USB 2.0 emulation mode. You can activate this option temporarily, for the time of Windows installation, and revert to full-speed USB 3.0 after installing Windows and USB 3.0 drivers.
If your computer's BIOS setup lacks USB 2.0 compatibility option for USB 3.0 controller,
then the only way to circumvent this error is to slipstream USB 3.0 drivers into Windows 7
setup image.
Driver slipstreaming is available only in FlashBoot Pro. Using FlashBoot Pro, you can install Windows 7 to any new laptop or new PC without any problems. This is especially useful for modern computer platforms, such as Sky Lake, Kaby Lake and Ryzen.
4. Versions of Windows this article applies to
This article applies to all versions of Windows after Windows XP: Windows Vista, Windows 7, Windows 8.x and Windows 10/11 (both 32-bit and 64-bit editions), as well as equivalent Windows Server operating systems.
| About us | Partners | Contact us | Privacy policy |