Installing Windows XP With F6 AHCI/RAID Drivers From USB Only
Sometimes installing Windows can be a truly challenging problem. For example, if you need to install Windows XP (because it's an old hardware uncapable of running something better), and you need to install operating system to the SATA HDD in AHCI mode or to the RAID controller (with appropriate F6 floppy drivers), but you have neither CD/DVD nor floppy drive available, just USB ports!
Using the power of FlashBoot, you can solve even this challenge. This article explains step by step, how to install Windows XP with builtin F6 floppy drivers for AHCI/RAID disk using USB thumbdrive only.
1. What is AHCI/RAID drivers? Who needs them?
Hard Disks (HDD) and Solid State Disks (SSD) are connected to the computer via controller (a chip on the motherboard). Modern disks have Serial ATA (SATA) interface, old generation of disks had ATA interface.
SATA controller can work in two modes: ATA-compatible mode (i.e. look like ATA contoller to operating system), or AHCI mode (new mode which enables all features of modern hardware.
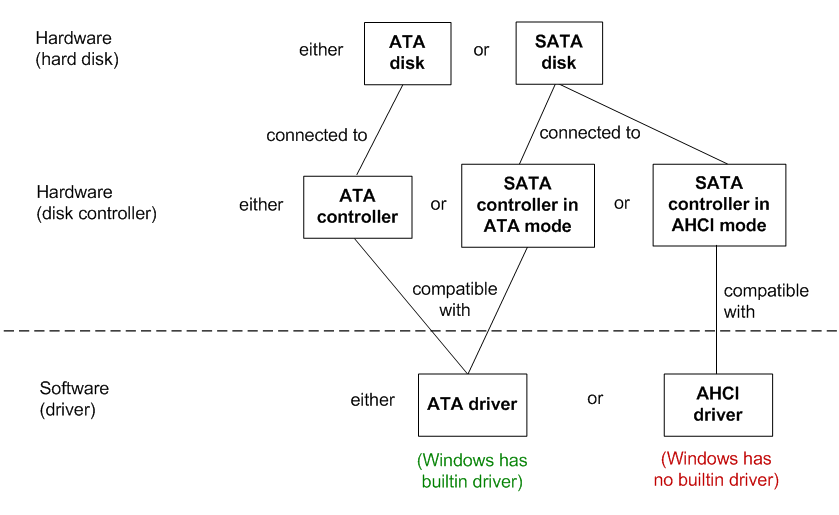
From the operating system's perspective, disk contoller operates either in ATA mode (old ATA contollers + new SATA controllers in ATA-compatible mode) or in AHCI mode (new SATA controllers in AHCI mode).
If you have SATA disk attached to disk controller in AHCI mode, you need special
driver from motherboard vendor in order to make it work in Windows XP.
If you are using ATA disk or your SATA contoller is in ATA-compatible mode, then you don't need any special driver — Windows XP already includes one.
RAID driver is requred when you combine multiple disks into redundant array (so if one of them fails, another one persists; or to gain additional speed). Likewise AHCI, operating system can't handle such situation by default, "out of the box", and requires special assistance from you for that case — in the form of driver.
2. What's F6 floppy drivers for Windows XP installation?
How do they differ from normal Windows drivers?
Usually Windows drivers can be installed when installation of the Windows itself is complete. This way works great for 3D video card drivers, sound drivers, network drivers etc. But it doen't work for disk drivers. Why?
The reason this way doesn't work for disk drivers is because Windows must have access to the disk all the time during installation. Temparary disability to use 3D graphics, sound and network during Windows installation is acceptable, but disability to use hard disk (even temporary disability) makes Windows installation effectively impossible.
So, unlike other types of drivers, disk drivers must be installed not after Windows installation, but along with it. But how?
Windows provides special mechanism for that purpose: loading drivers during Windows Setup,
when Windows Setup had not yet loaded Windows Kernel, and operating in Text Mode. What's why
these drivers are officially called "Text-Mode Drivers", but people usually search for
them in Google as "F6 Floppy Drivers", so I prefer to call them that way.
Back to the subject. How do there drivers differ? What's special about Text Mode Drivers? They are loaded into memory before Windows Kernel, so there are no USB drivers loaded yet at that stage, no CD-ROM drivers, no bus drivers, nothing at all. The only type of disks which are readable at that time are BIOS disks. And BIOS by default provides access to HDD and FDD (floppy disks). Nothing more. As a special exception, CD/DVD and USB drives may be accessible too, but only if computer is booting from them right now. Otherwise, only HDD and FDD are accessible.
For that reason, Windows must load Text Mode Drivers from floppy. Everything else is inaccessible under BIOS.
3. What should I do if I don't have floppy disk drive, but I must use F6 floppy drivers?
First of all, you can try to disable AHCI mode in your BIOS setup and turn your SATA disk controller into ATA compatible mode. Unfortunately, for some notebooks there's no such option in their BIOS setup. Also, AHCI mode is modern, thus better than ATA in terms of speed (NCQ) and features (for example, hotplugging).
The rest of this article assumes that you have to install Windows XP on SATA disk plugged via SATA controller configured in AHCI mode, or via RAID contoller.
Because floppy does not exist, HDD is uninitialized, and everything else is just unavailable
in Text-Mode Setup under BIOS, the only way to go is to add AHCI/RAID drivers to
Windows Installation CD itself.
Windows already contains hundreeds of drivers for wide range of supported hardware, but not for everything, unfortunately. For example, Windows has builtin support for ATA disk controllers (see figure above in this article).
So, all you need is just to add (intergrate) your particular driver to the long list of "default" drivers.
4. How to integrate F6 AHCI/RAID drivers into Windows XP installation disk / ISO file?
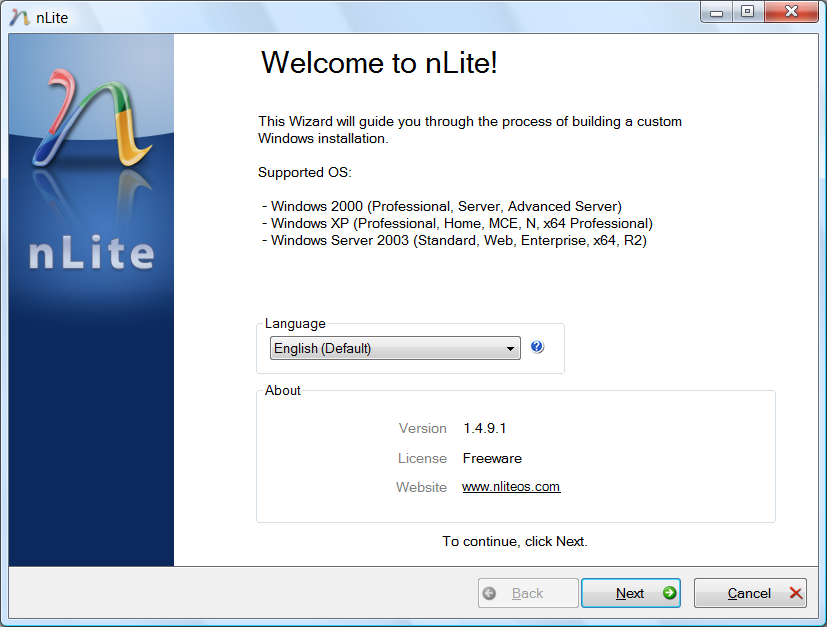
There's a special software for that purpose called nLite. nLite could be downloaded from official website https://www.nliteos.com/download.html, also here is a local copy (v.1.4.9.1).
Step-by-step guide follows:
1) Copy contents of your Windows XP Installation CD into the new folder and call it "WinXP".
2) Download F6 floppy drivers from website of your motherboard vendor, notebook vendor or chipset (south bridge) vendor.
3) Extract F6 floppy files from archive file to separate folder. If your vendor provides self-extracting archive in the form of EXE file only, which requires actual floppy disk drive to be present, and you have none, then you can work around with Virtual Floppy Driver (VFD, Windows XP 32-bit only) or virtual machine like VirtualBox or VMWare.
4) Run NLite and choose "Next":
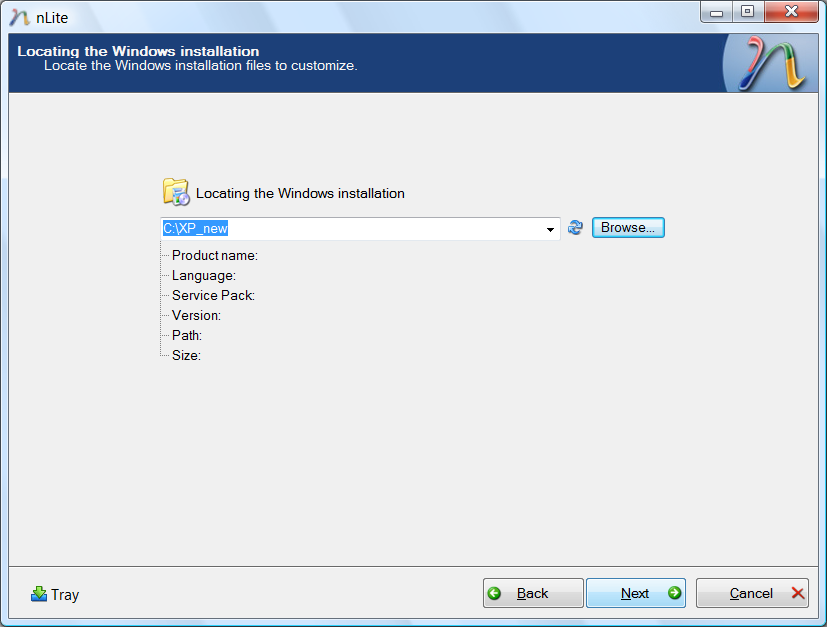
5) Choose Windows input/temporary folder ("WinXP" in this example) and click "Next":
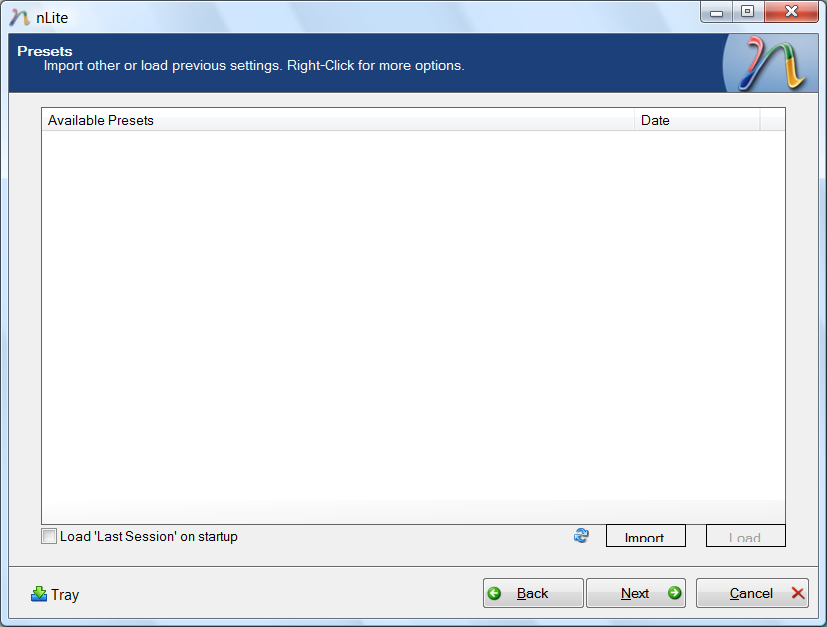
6) You'll come to "Presets". Ignore this screen by choosing "Next" one more time:
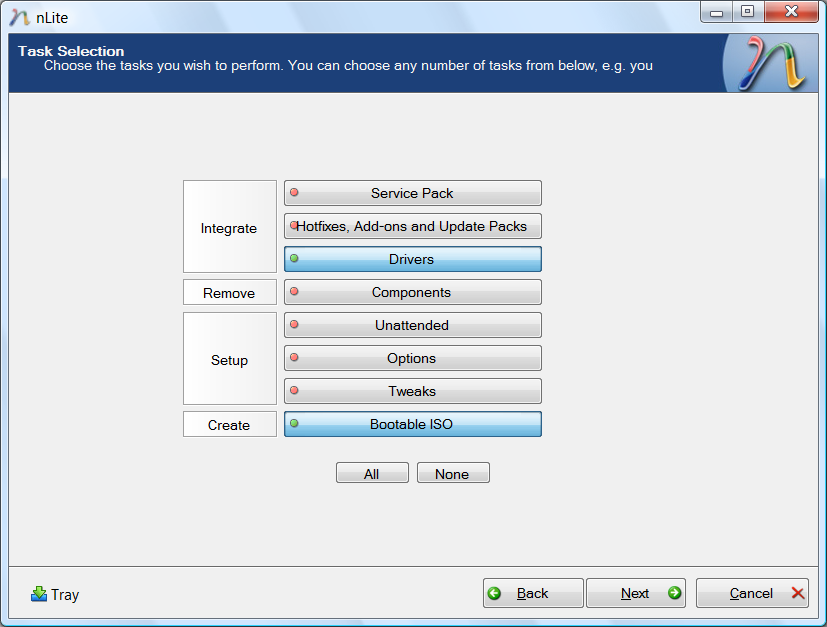
7) In "Task Selection" screen, select "Drivers" and "Bootable ISO" by pressing corresponding buttons. Then click "Next":
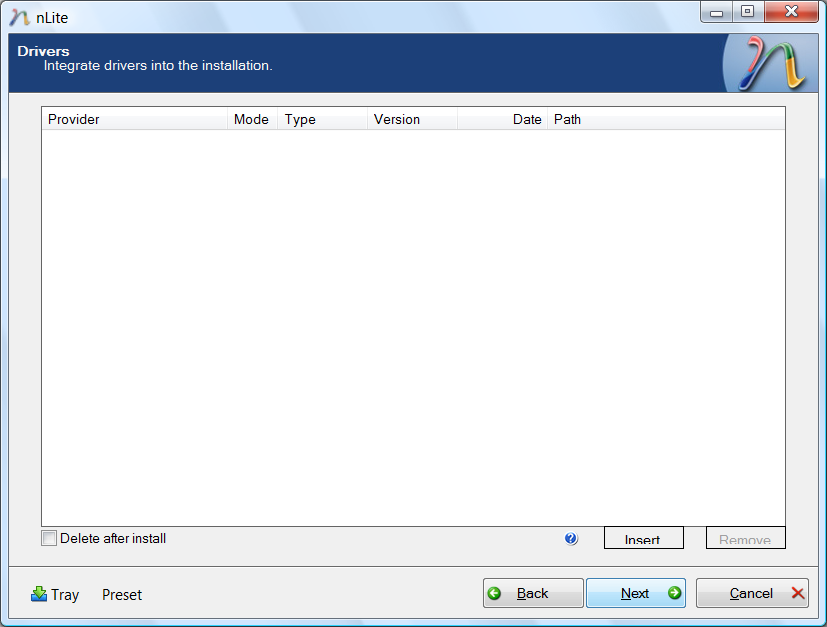
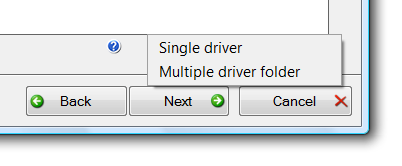
8) Choose "Insert" → "Single driver":
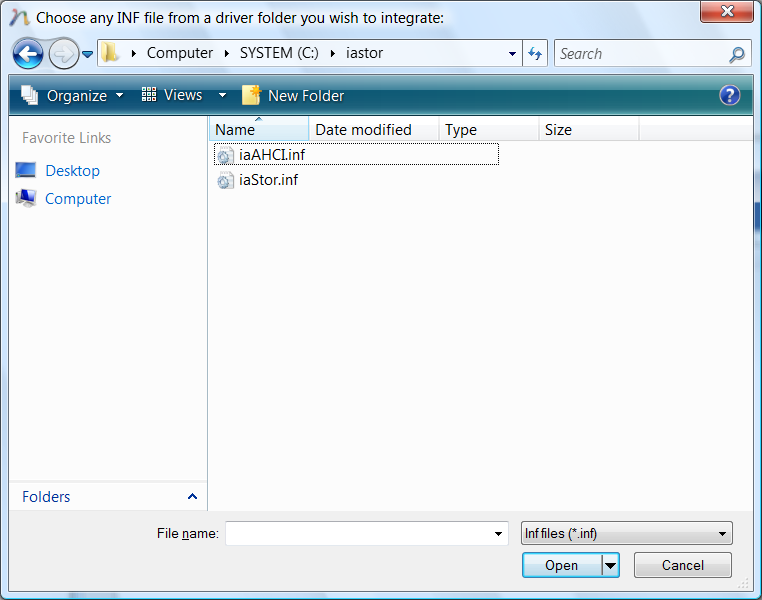
9) Navigate to previously extracted floppy files (step 3) and choose one of the files ("iaahci.inf" in this example):
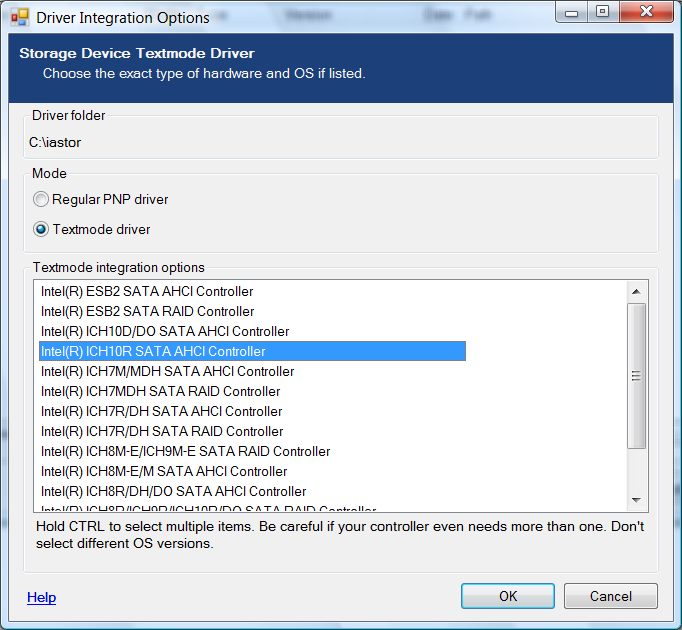
10) You may see this screen if your INF/SYS files are for multiple devices. Choose your device from the list.
If your INF/SYS files are for single device, you won't see this screen.
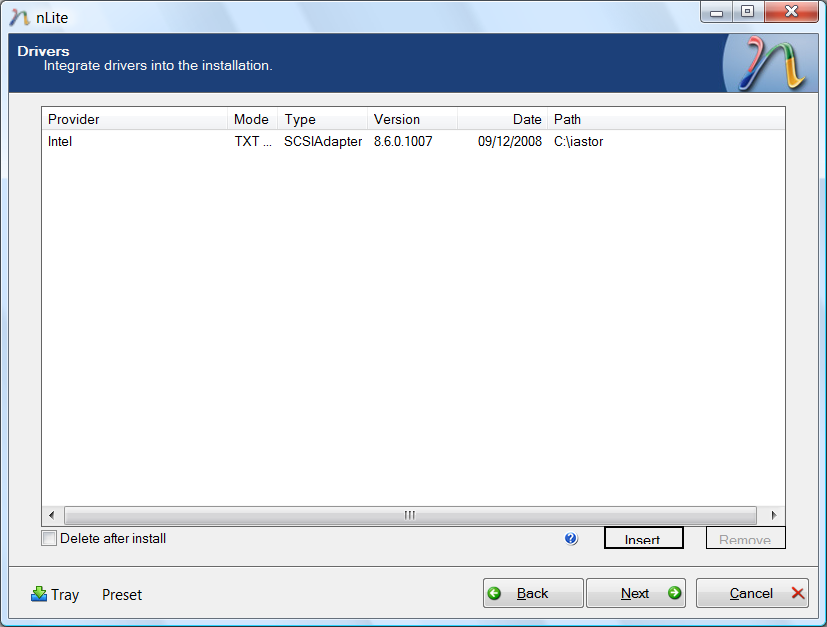
11) Click "Next" to confirm the driver list:
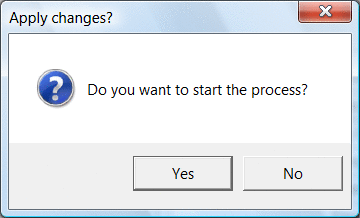
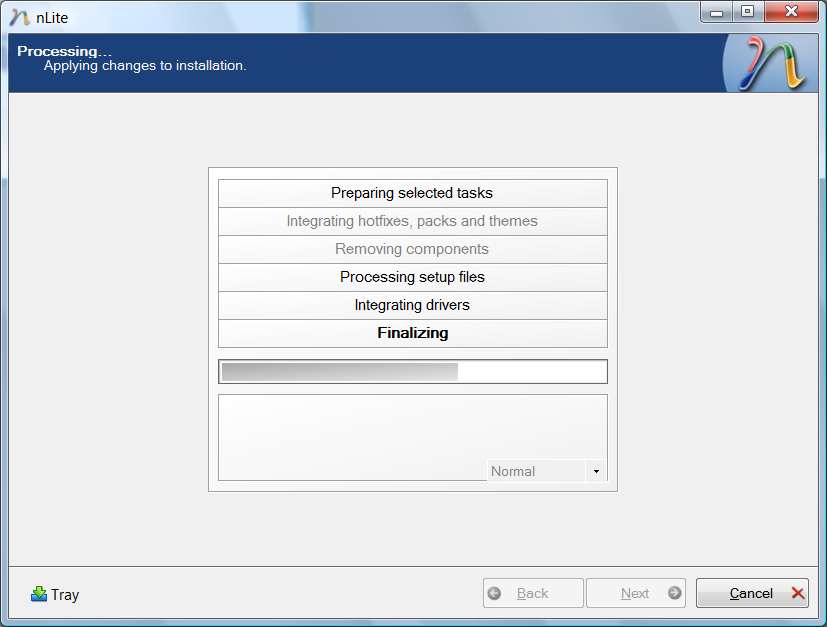
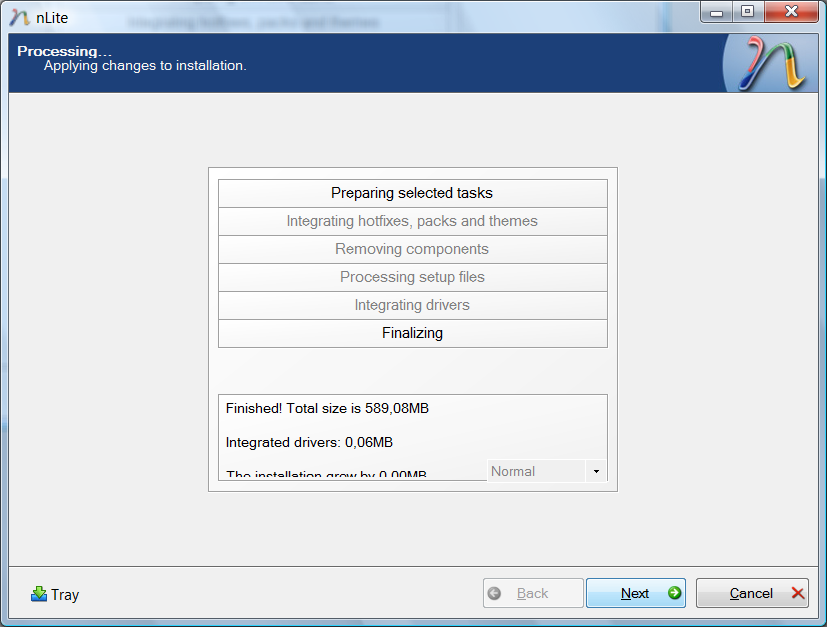
12) Say "Yes" in "Do you want to start the process?" dialog. Wait for process completion. When it finishes, click "Next":
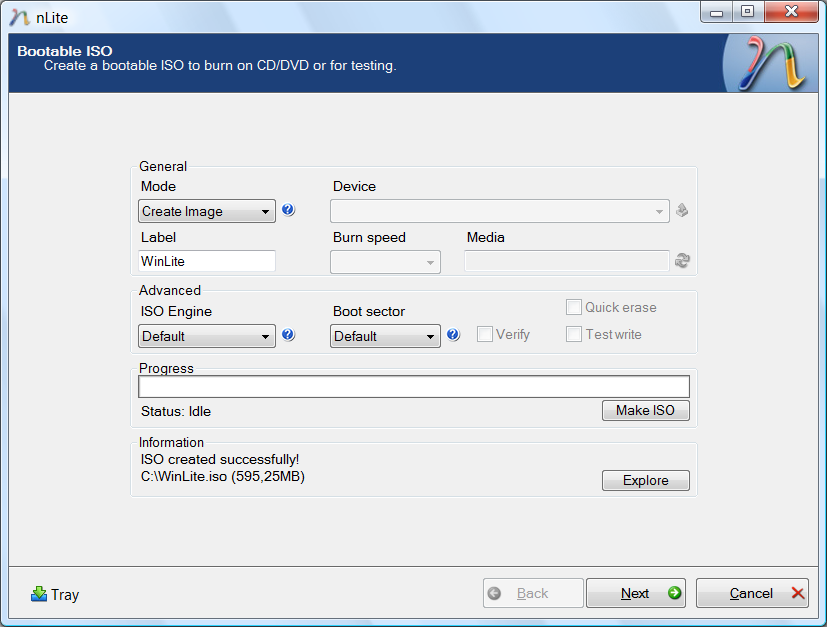
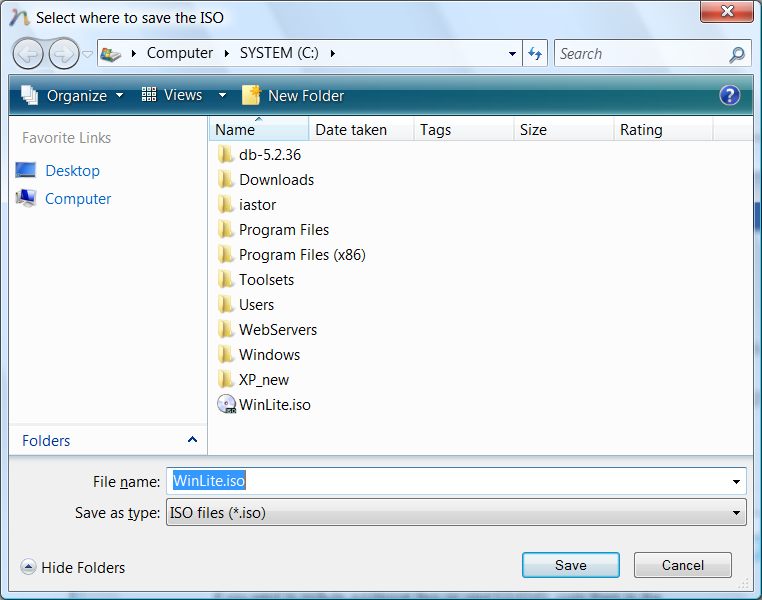
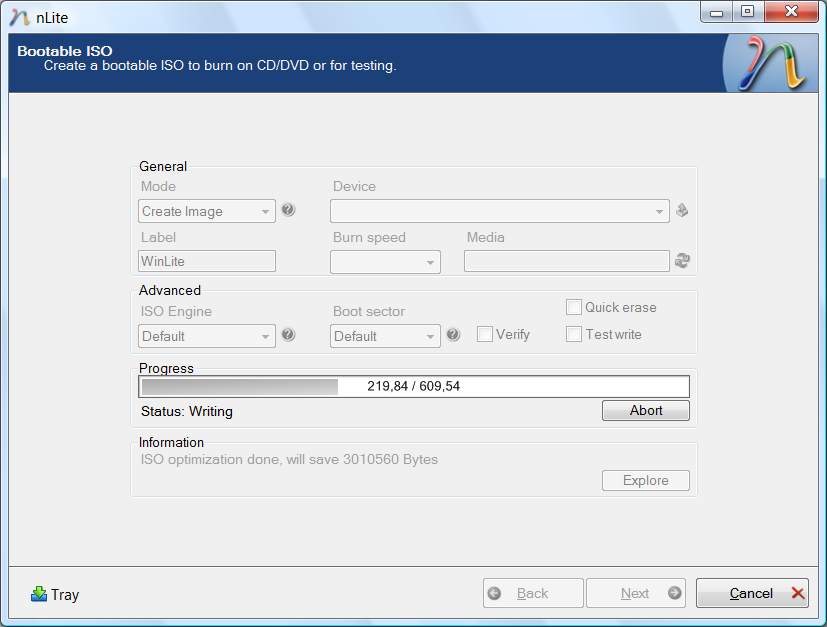
13) Set "Mode" to "Create Image", then click "Make ISO" and choose where to save the output ISO file. Then wait for completion and click "Next":
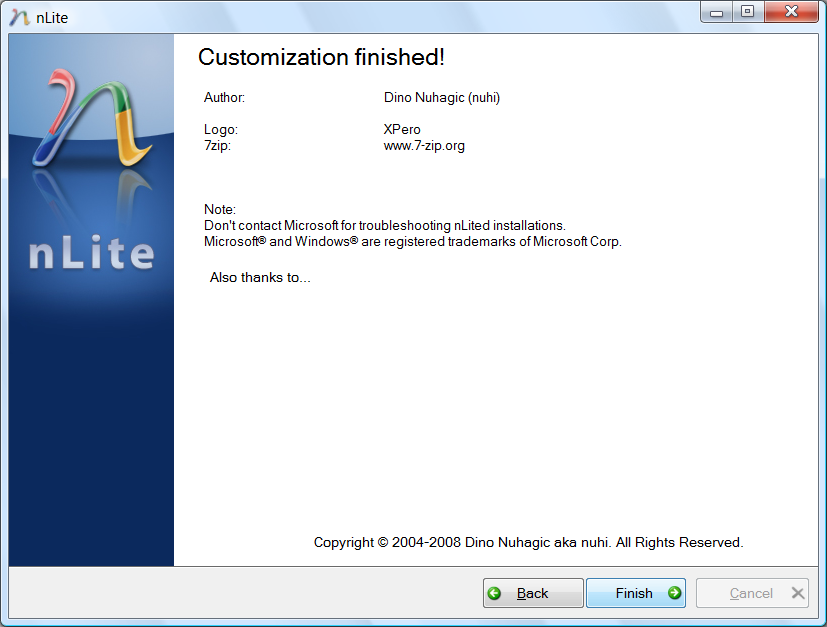
14) This is a last page. Click "Finish" to exit wizard.
5. How to install Windows XP from customized ISO file with F6 AHCI/RAID drivers if I don't have DVD drive?
Use FlashBoot to convert customized ISO file into bootable USB thumbdrive. The process is explained in detail in this article.
6. Troubleshooting
If you have problems integrating SATA/AHCI drivers into Windows XP, read this section.
Q: Which operating systems are supported/recommended?
A: None of pre-Windows 2000 (Windows 3.11, Windows 95/98 and Windows ME). Windows 2000 may work
with some Intel drivers. It's recommended to use Windows XP (32/64bit) or Windows Server
2003 (32/64bit), depending on availability of Text Mode Drivers from the vendor of your
SATA/RAID controller.
Q: Do I need to tweak anything in BIOS setup?
A: Yes, you need to enable AHCI mode for your SATA controller, or optionally enable RAID features.
Sometimes BIOSes have shortage of low memory address space for all installed cards
and onboard controllers, so if it doesn't work maybe you need to disable something else
in your BIOS setup to gain free space in low memory for ROM BIOS code of your RAID controller.
Q: It's still not detected.
A: Some motherboards have multiple SATA controllers. For example Intel X58-based ASUS P6T
has SATA controller in southbridge Intel ICH10R and also JMicron JMB363 as a separate
onboard chip. Please make sure you've attached your harddisk(s) to the same controller
you are installing drivers for. Consult your mainboard manual if you are unsure about that.
Q: nLite or Windows Setup is giving me some weird errors.
A: Please use clean, unmodified images of Microsoft Windows XP as input to nLite.
Q: Any other ideas why it might not work?
A1: BIOS bugs. Try to reflash your BIOS to the latest version.
A2: Maybe you are intermixing 32-bit/64-bit drivers and operating system of different bitness.
A3: Make sure your copy Windows XP has at least Service Pack 2 integrated.
A4: The Power Management (ACPI) should be enabled in BIOS setup.
Q: I have troubles guessing correct answer on the step 10.
A: You can choose them all by holding Ctrl and clicking all of them one after another
(don't hold Ctrl while scrolling). Windows Setup will find and install the
correct driver automatically.
| About us | Partners | Contact us | Privacy policy |