How To Change Disk Controller Mode From IDE to AHCI Without Reinstalling Windows XP
Disk controller for SATA HDDs can operate in both AHCI and IDE compatible mode. You can switch between them the in BIOS setup. AHCI mode works faster and has more features, while IDE compatible mode requires no special drivers to install older operating systems like Windows XP. Unfortunately, if you decide to switch between IDE and AHCI after installing Windows, you will get a BSOD (blue screen of death) during the next boot.
This article explains how to switch from IDE to AHCI after installation of Windows XP, how to change disk controller mode from IDE to AHCI without reinstalling Windows.
1. Intended audience
This article is for users who want to switch SATA controller from IDE-compatible mode (aka ATA-compatible mode) to AHCI mode without reinstalling Windows XP.
Primary motivation for such a switch is to gain additional performance from disk I/O (SATA NCQ), especially for SSD hardware. Also recommendations from this article are useful in dual-boot configurations, where other OS must use SATA controller in AHCI mode, and Windows XP as a first OS is using SATA controller in IDE mode.
2. Check prerequisites
- Make sure your operating system is Windows XP. If you are using Windows 7 or Vista, then read this article.
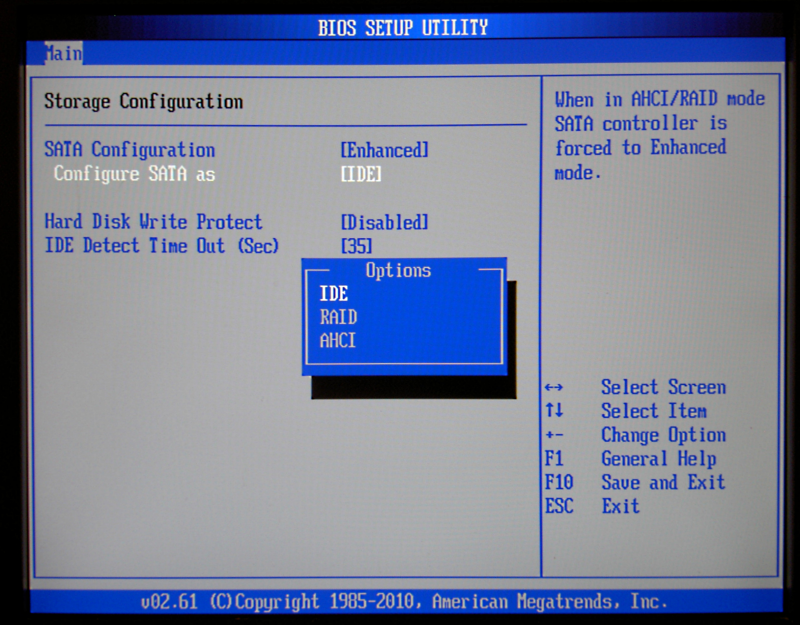
- Reboot your PC, enter BIOS setup (press DEL or F1) and make sure that currently SATA controller is configured in IDE mode; and support of AHCI mode exists in BIOS.
3. Find or download F6 textmode AHCI driver for your SATA controller
- Find out the name of your chipset (south bridge). It should be in the user guide of your motherboard or notebook, or at the manufacturer's website. Also one can try to find the SATA controller in the Windows Device Manager under "IDE ATA/ATAPI controllers" or "Storage controllers".
- Check your motherboard/notebook driver CD, try to find F6 textmode AHCI driver for your chipset (southbridge). F6 textmode AHCI driver consists of TXTSETUP.OEM, one or several INF files(s), SYS file(s) and CAT file(s). SYS file is a driver itself, CAT file is a catalog of digital signatures to verify integrity of the driver, and INF is an informational file for Windows operating system how to detect hardware, and how to install/uninstall the driver. For example, Intel AHCI driver for ICH10R chipset consists of iaahci.cat, iaAHCI.inf, iastor.cat, iaStor.inf, IaStor.sys, and TXTSETUP.OEM.
- If you could not find F6 textmode AHCI driver on the CD, check manufacturer's website of the motherboard/notebook, and also check manufacturer's website of the chipset. For example, for ASUS EEC PC 901 netbook with Intel ICH7-M southbridge, you should check both ASUS and Intel websites. Also downloading latest drivers from manufacturer's website may be helpful if old version of driver from motherboard/notebook CD was found, but didn't work because of alleged bugs. (But bear in mind that sometimes new version of drivers has new bugs, not present in old version.)
4. Perform upgrade installation of AHCI driver via Windows Device Manager
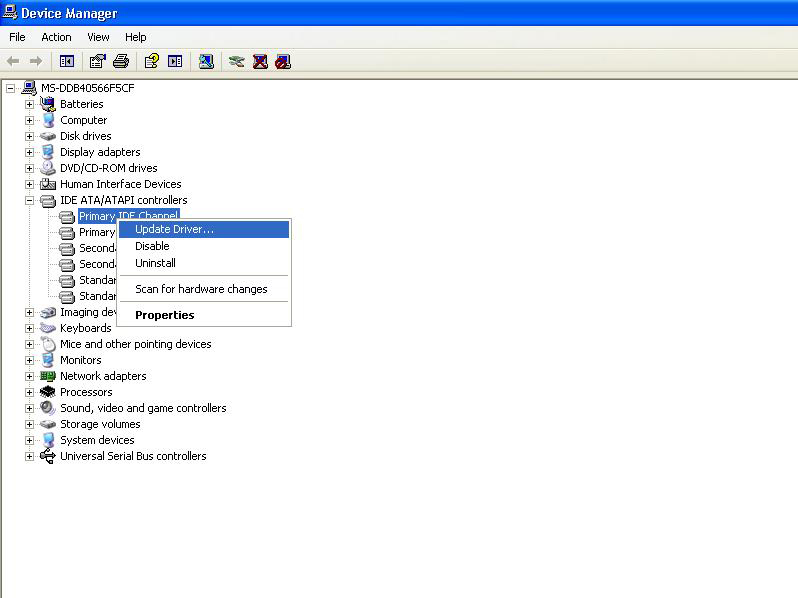
Right-click My Computer, choose Properties, then Device Manager.
Expand IDE ATA/ATAPI controllers, then right-click on Primary IDE Channel and choose Update Driver... from the context menu:
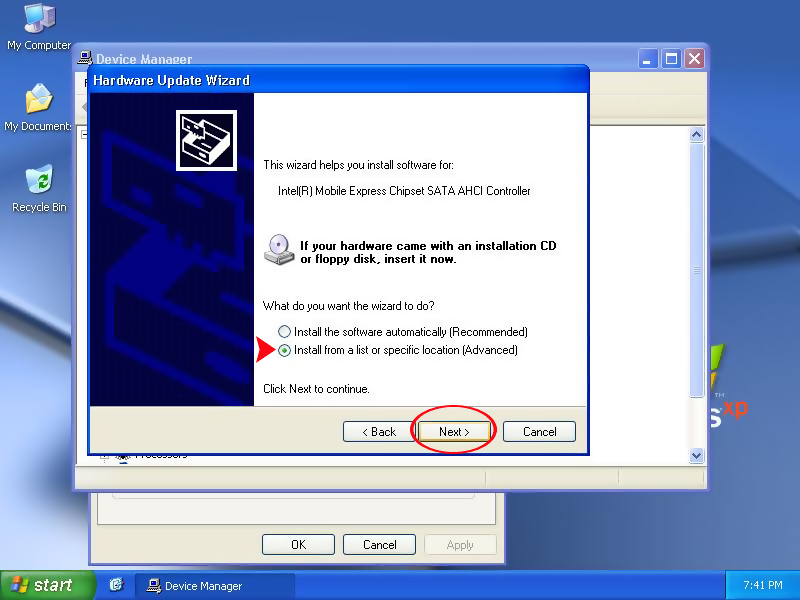
Choose not to use Windows Update this time:

Choose to install driver from specific location:
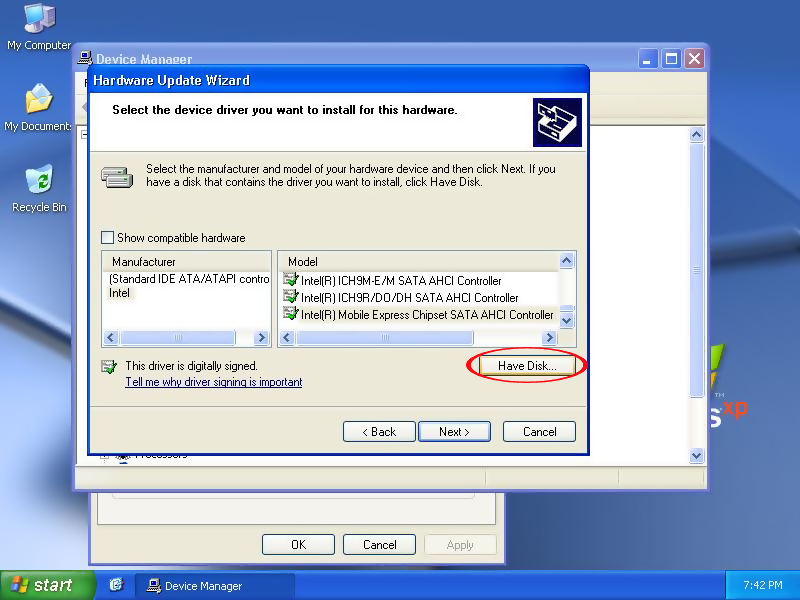
Choose not to use search:

Press Have Disk... button:
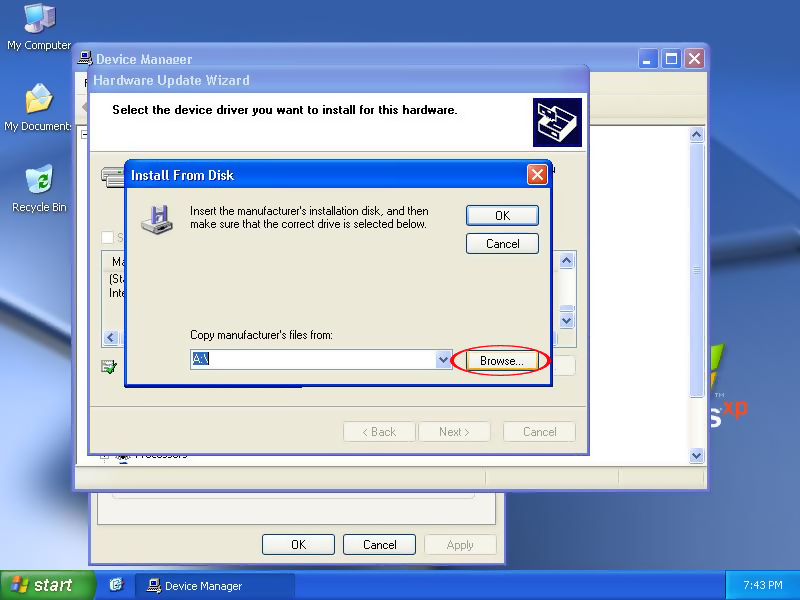
Install From Disk window will pop up. Press Browse... button there:
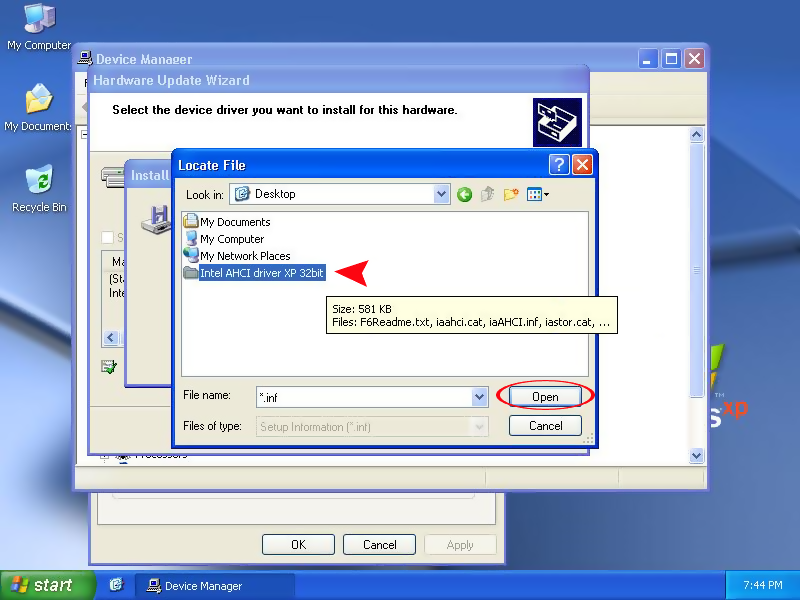
Choose a folder where you have F6 floppy drivers for AHCI mode of your SATA controller:
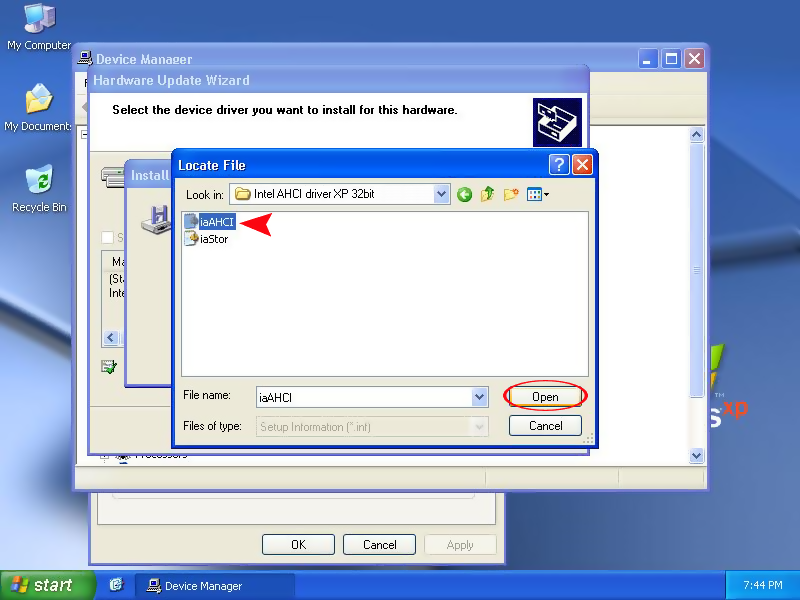
Choose a proper INF file (AHCI, not RAID) if you have more than one:
Click OK:

Click Next >:

Click Finish:
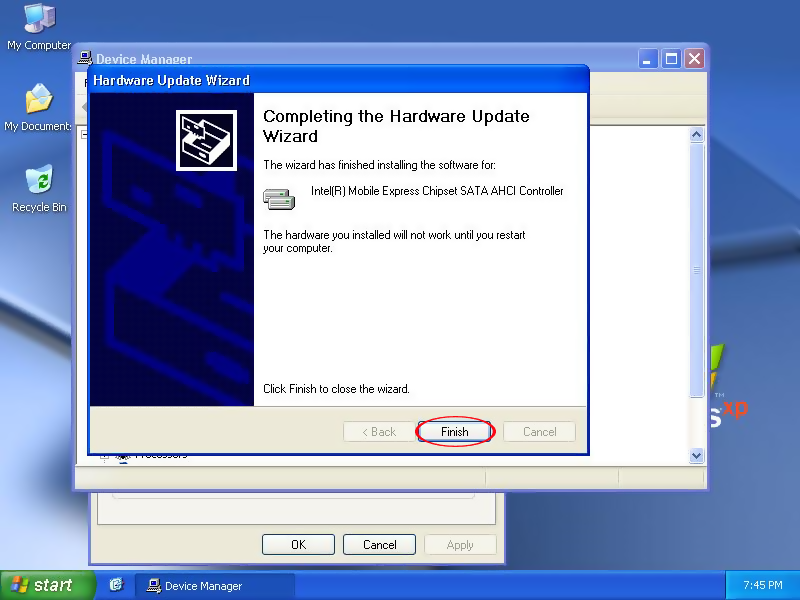
Now reboot your PC.
5. During reboot, make configuration changes in BIOS setup
During reboot, enter BIOS Setup (press DEL or F1 key) and enable AHCI mode for your SATA controller:
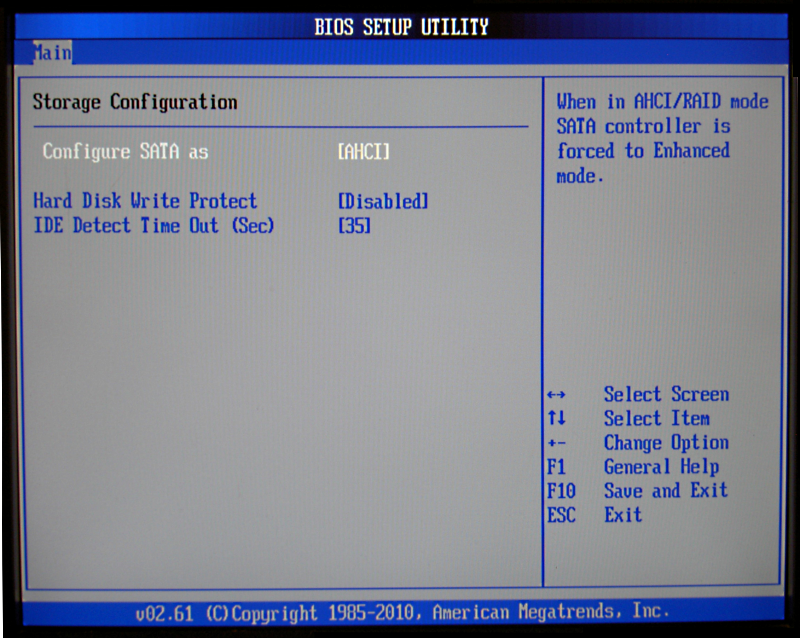
Save changes when leaving BIOS Setup.
If you fail to change SATA controller mode in BIOS setup during this reboot, then Windows will fail to boot with BSoD (Blue Screen of Death). Stop code will be 0x0000007B: INACCESSIBLE_BOOT_DEVICE.
6. Verify everything is OK, allow second reboot if necessary
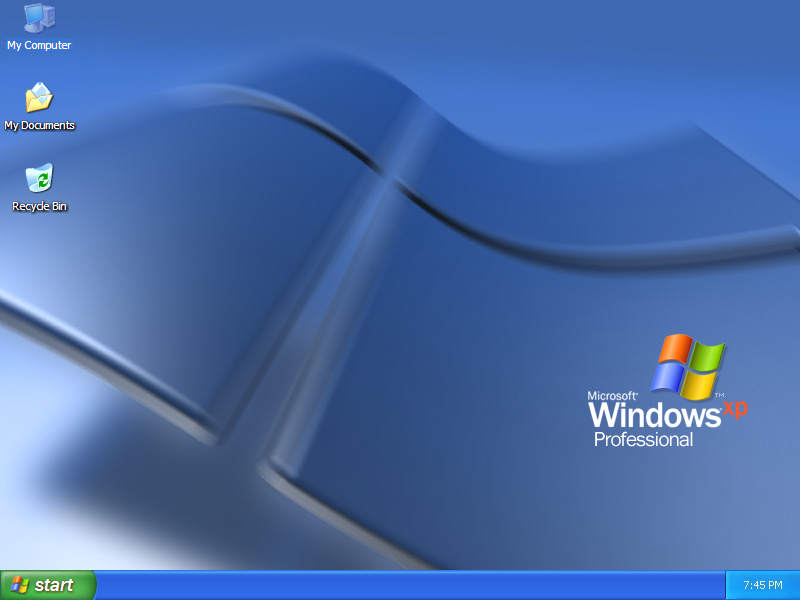
Make sure that Windows loaded normally:
New detected hardware balloons may appear in the tray area after the first reboot after driver update. Also Windows may ask permission to reboot just after installing the drivers, allow second reboot if Windows asks for it.
7. Troubleshooting
Reasons why it might not work:
- You have downloaded a driver for wrong hardware, not for your chipset (south bridge).
- You have downloaded a driver for different operating system (not Windows XP).
- You have downloaded 64-bit driver for 32-bit OS or vice versa.
- You didn't switch SATA controller from IDE-compatible mode to AHCI mode in the BIOS setup during first reboot.
How to undo IDE to AHCI driver update (revert to IDE mode):
- Download Emergency Boot Kit and deploy it to USB thumbdrive. You need a full version in this case.
- Run Emergency Boot Kit Registry Editor, open HKEY_LOCAL_MACHINE\SYSTEM registry hive, note the value of Select\Current (NNN).
- Go to registry key ControlSetNNN\Services\pciide and set value Start=0 (it means "loaded by kernel loader").
- For example, your AHCI driver is called iastor. Go to registry key ControlSetNNN\Services\iastor and set value Start=3 (it means "started manually"). Substitute your particular name of AHCI driver instead of iastor as needed.
- Save changed registry hive HKEY_LOCAL_MACHINE\SYSTEM to disk (F2) and exit Emergency Boot Kit Registry Editor.
- Choose to reboot in the main menu of Emergency Boot Kit, go to BIOS setup and switch SATA controller to IDE mode before Windows is loaded, otherwise you get BSoD with stop code 0x0000007B: INACCESSIBLE_BOOT_DEVICE.
| About us | Partners | Contact us | Privacy policy |